[UE5][Easy] Generating GIFs from Unreal Engine Content
![[UE5][Easy] Generating GIFs from Unreal Engine Content](/content/images/size/w1200/2025/01/gifsave.PNG)
What problem does it solve?
Preparing lightweight animated images - GIFs - with Unreal Engine Content for embedding in webpages and social medias.
Prerequisities
For simplification I assume you already have Unreal Engine 5.X installed and know how to handle basic operations.
Background
While editing Coming soon post I wanted it to stand out with:
- Familiar Unreal Engine motive,
- Relation to the post purpose (welcoming site),
- Animated image for eye-catching.
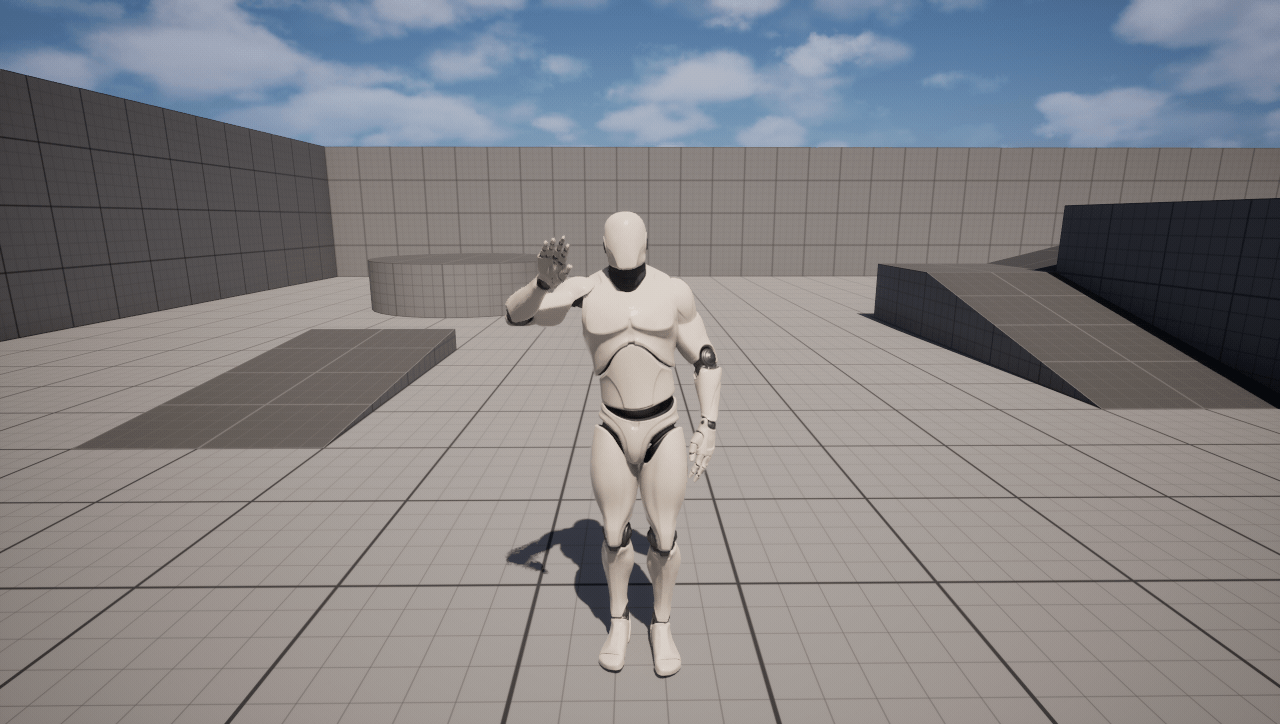
I decided to create a GIF from Unreal Editor, where default Manny Mannequin waves to the audience.
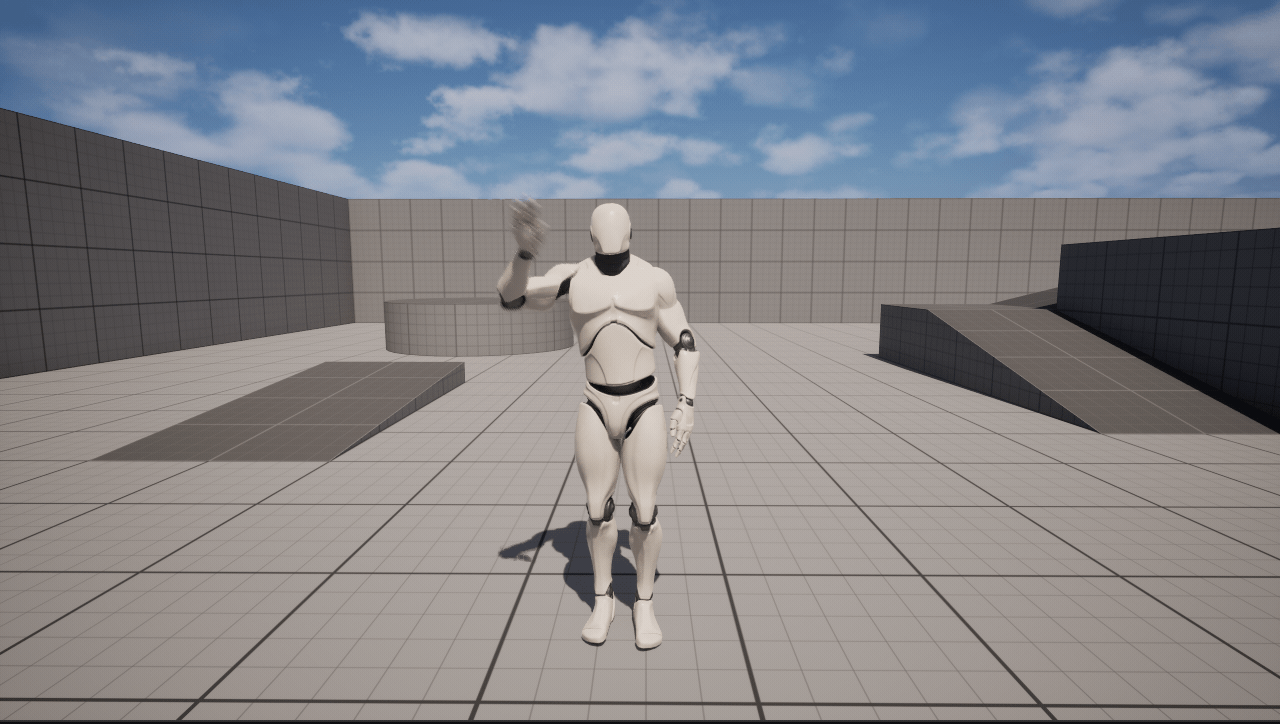
Result
Solution
TL;DR version
- Download ScreenToGif
- Create project from template (e.g. Third Person)
- Import required animation from portals like Mixamo
- Retarget animation if needed
- Place SkeletalMeshActor with Animation into the Level
- Remove obstacles from the Level (Character visibility, SkeletalMeshActor Collisions)
- Configure New Window Size to be considerably small and run project in New Window
- Record using ScreenToGif Screen Capture
- Remove unnecessary frames
- Save GIF using FFmpeg - Lower Quality preset
Regular Version
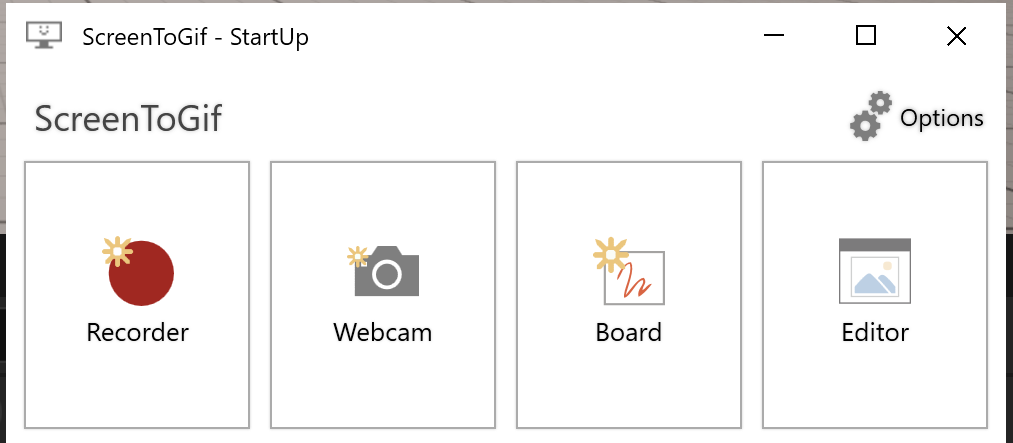
Download ScreenToGif
I managed to find and use ScreenToGif Open Source software which you should install and run when your scene is ready.
Setup the Scene
We need:
- Project Template (Third Person in this case),
- Waving Animation,
- Placing Waving Actor on the Level.
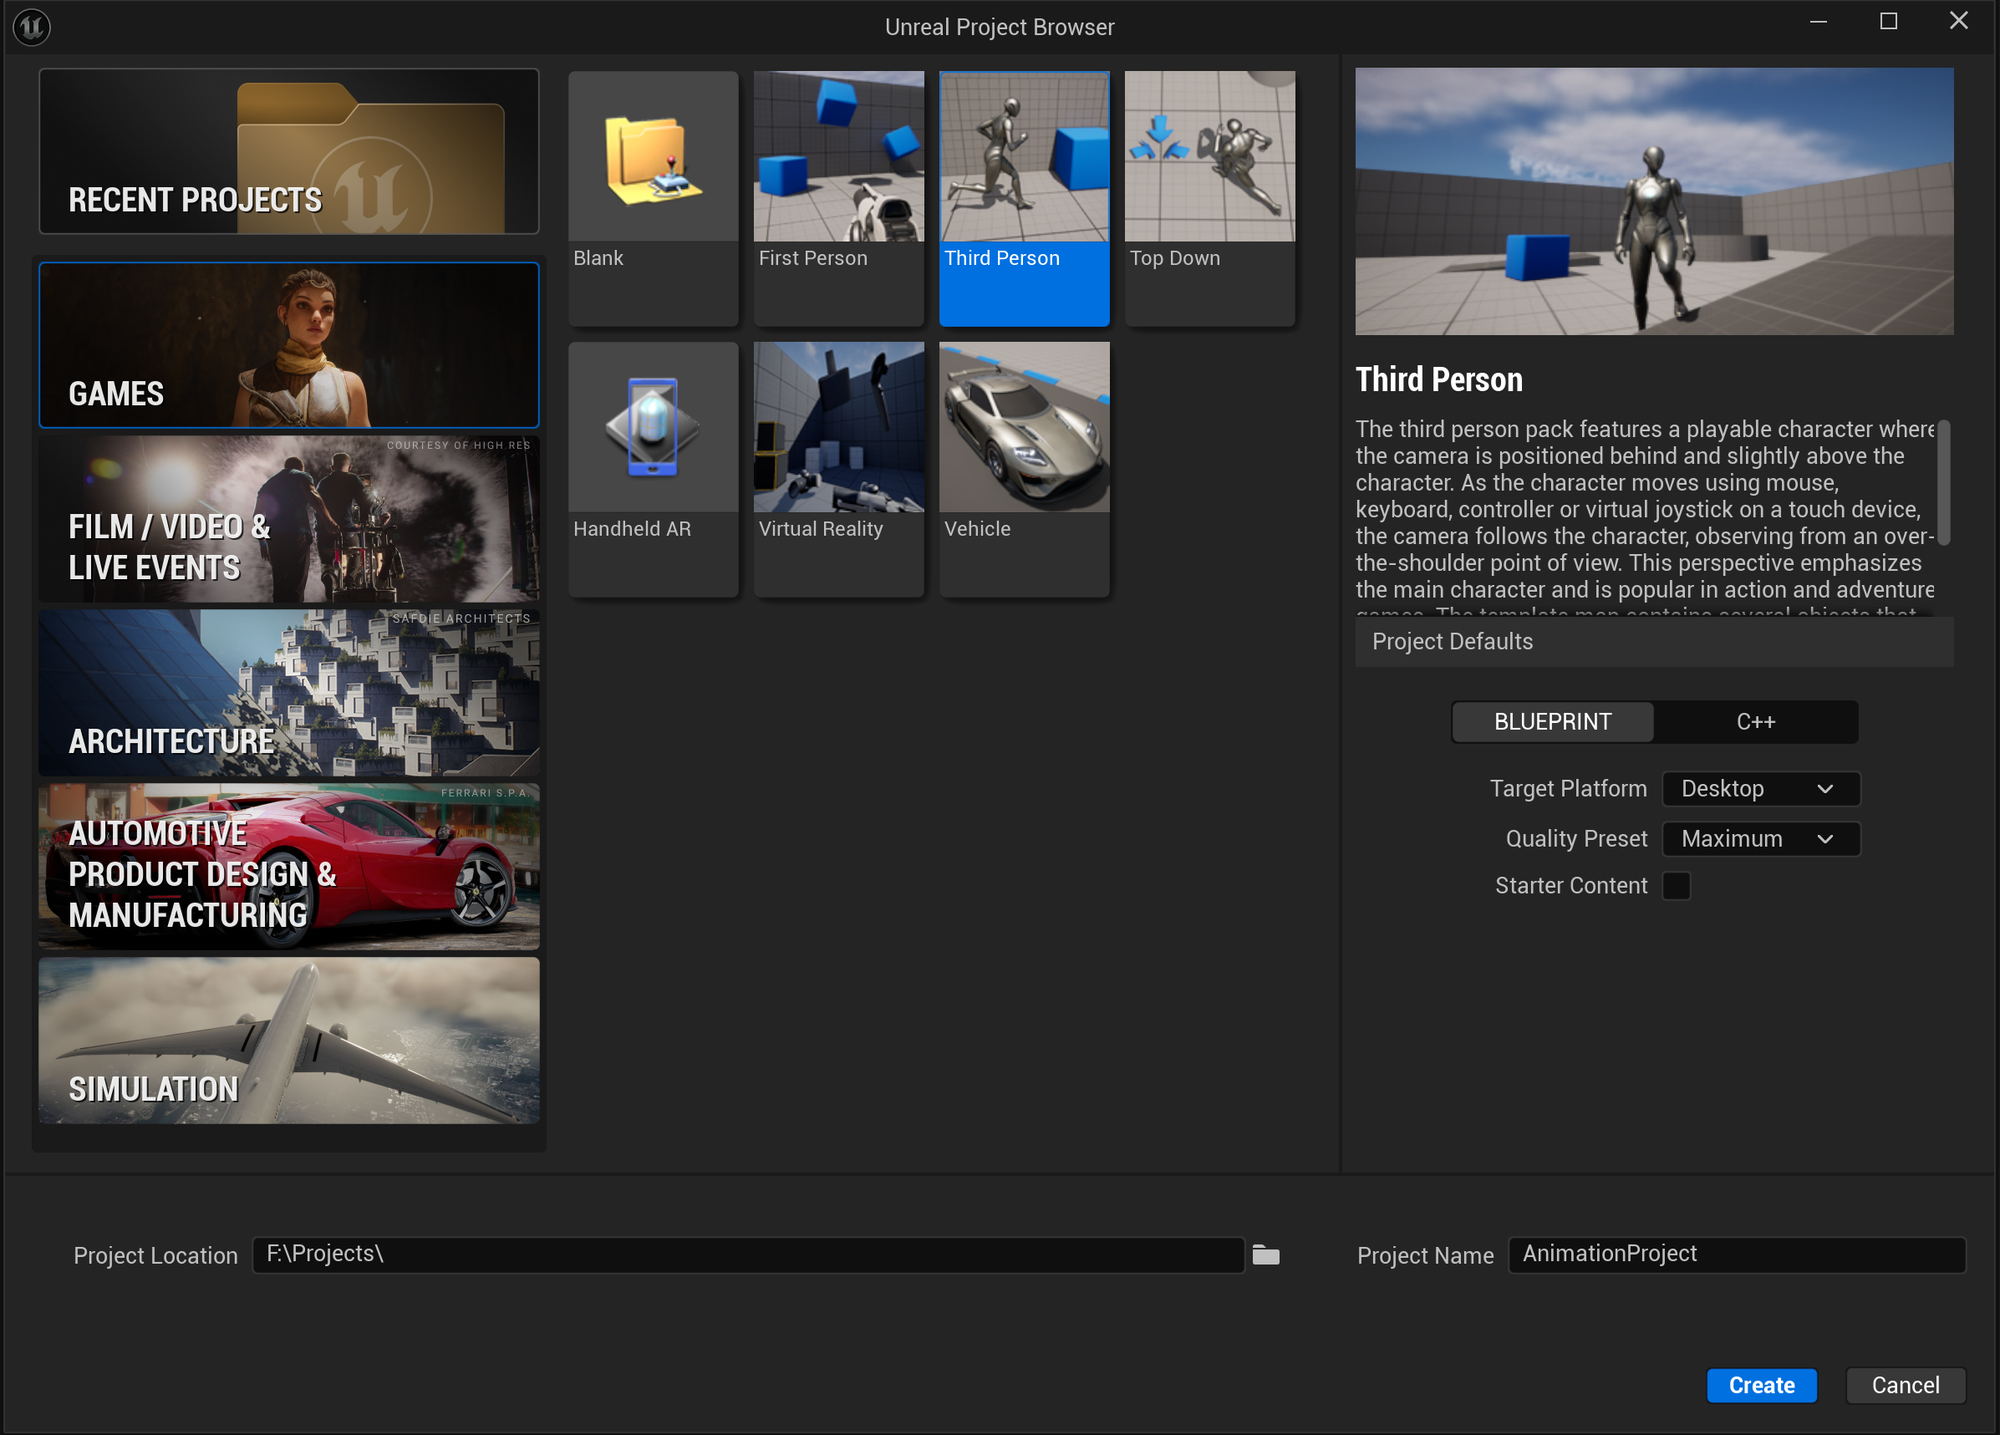
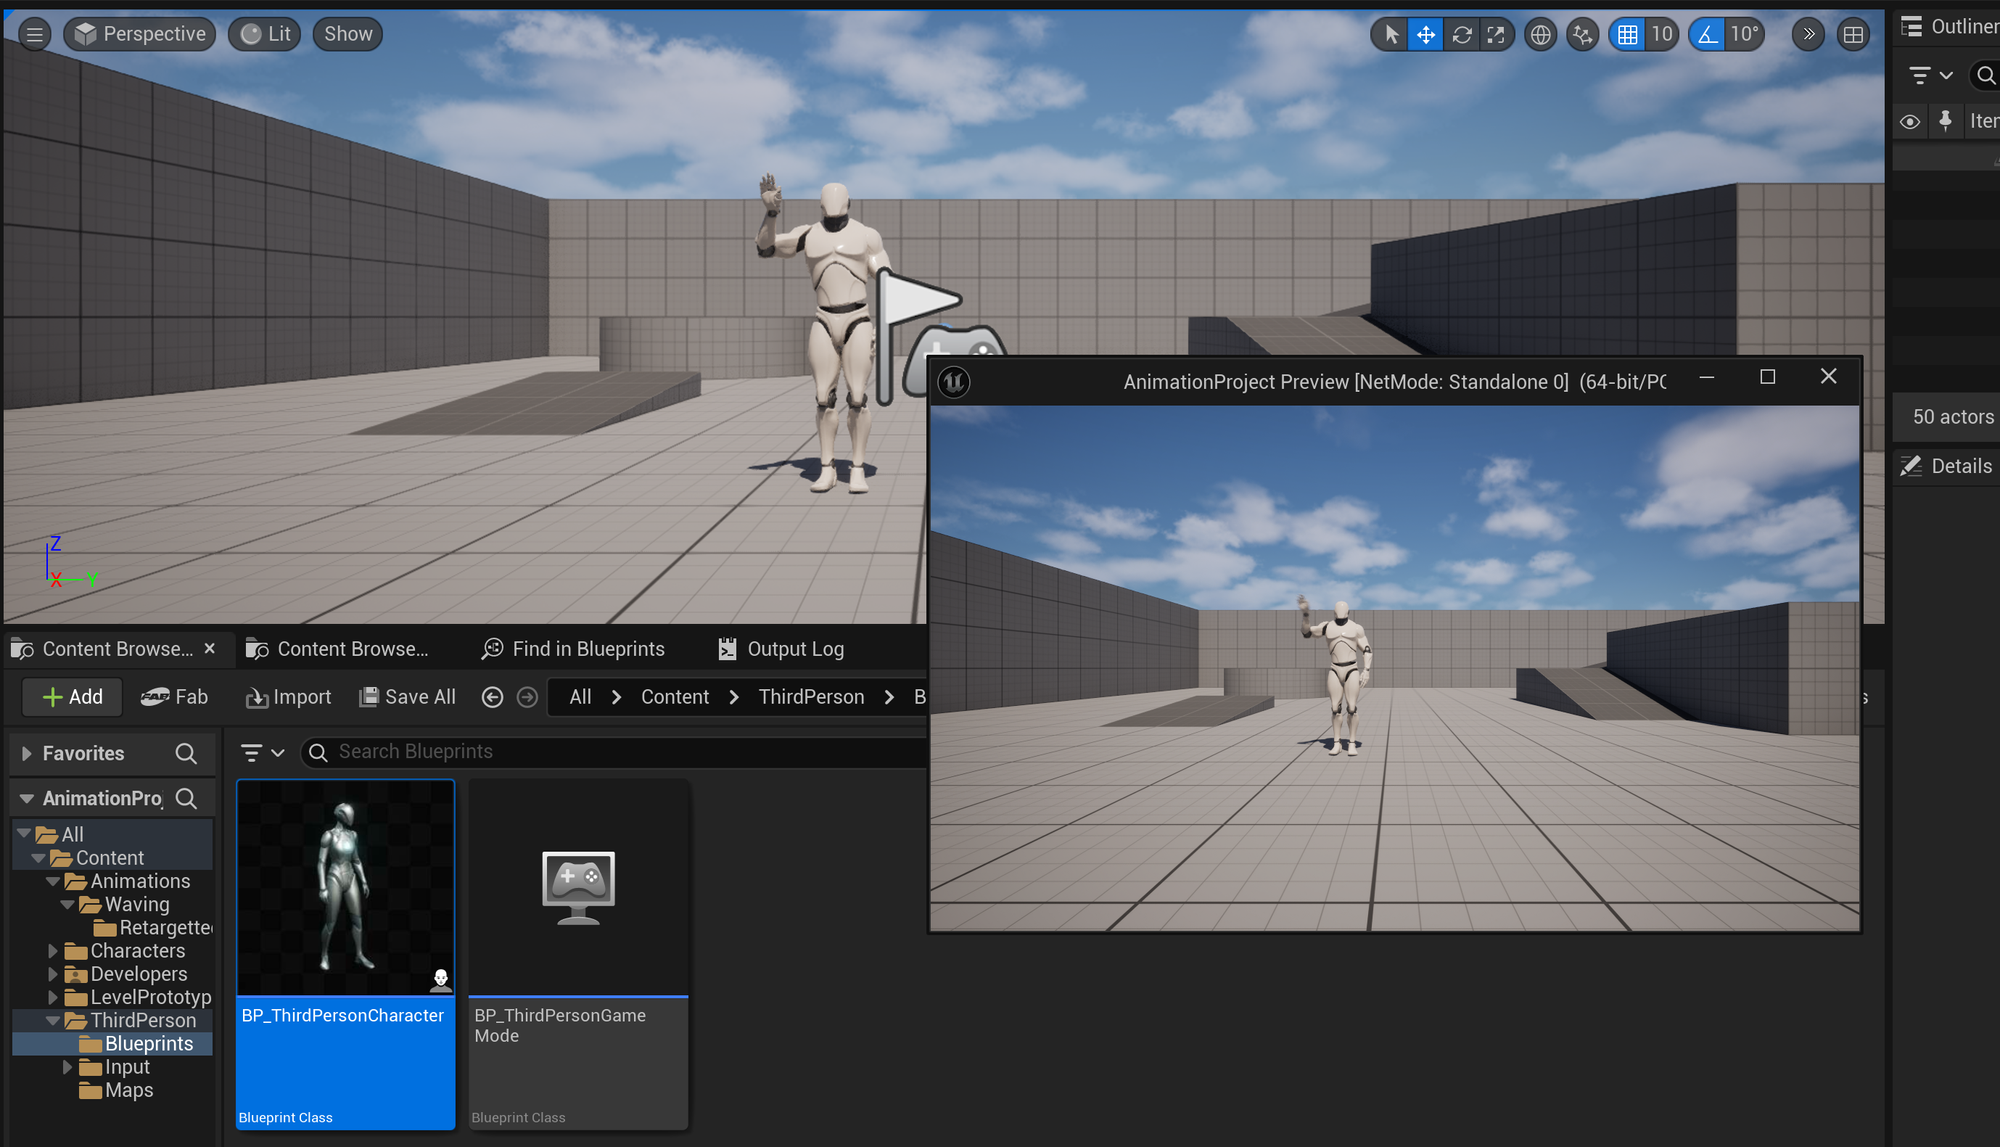
Create Third Person project from Template
Run Unreal Engine 5.X launcher and create project from Template
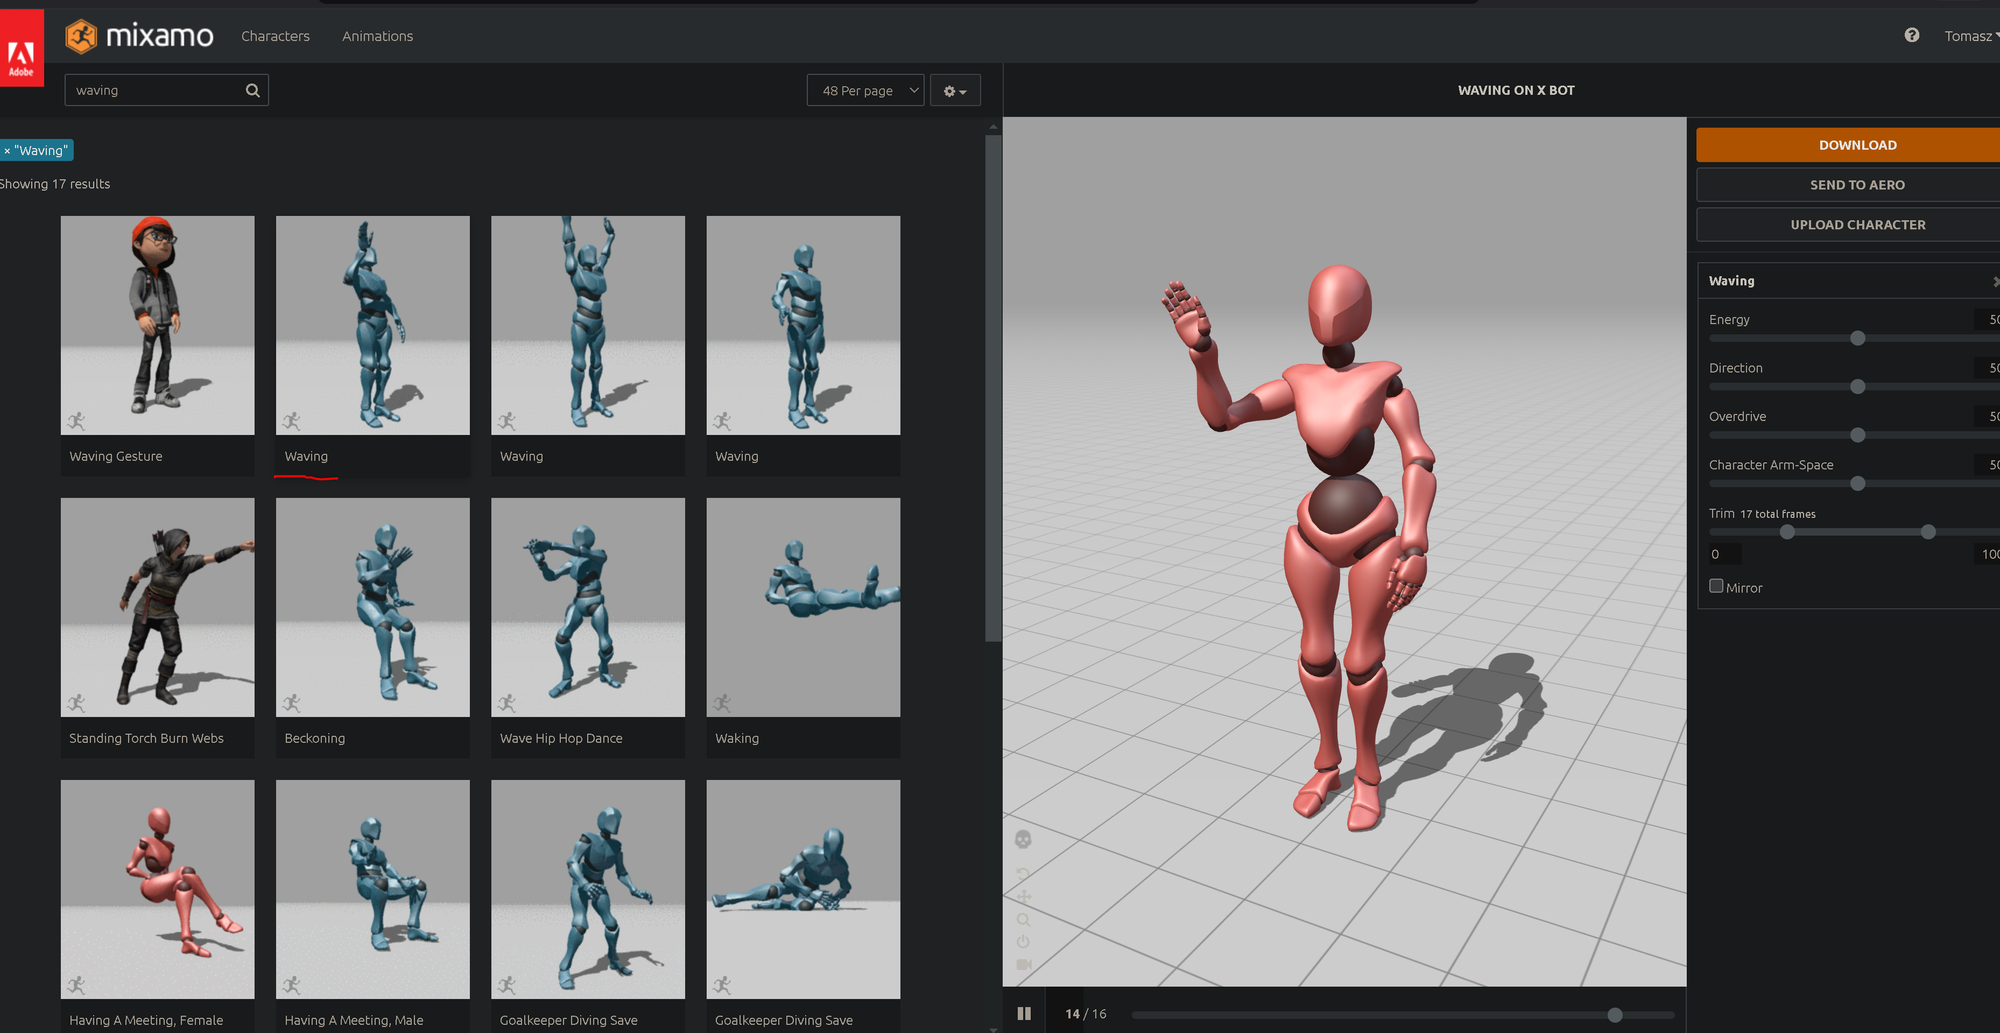
Obtain Waving Animation
Go to Mixamo (may require creating free account) and download Waving animation of your liking.
With following settings:
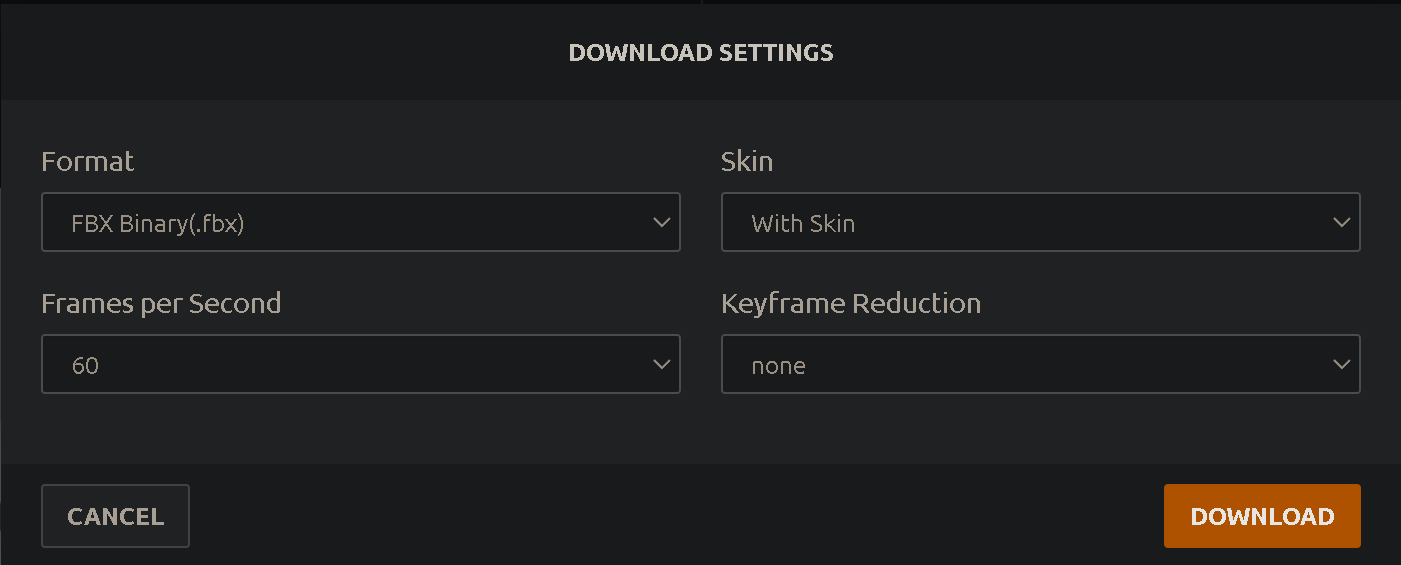
Save the Waving.fbx file on disk.
Import the animation
Create an Animation\Waving folder inside Content folder and drag and drop the Waving.fbx inside.
Click Import button on the following Import Content window.
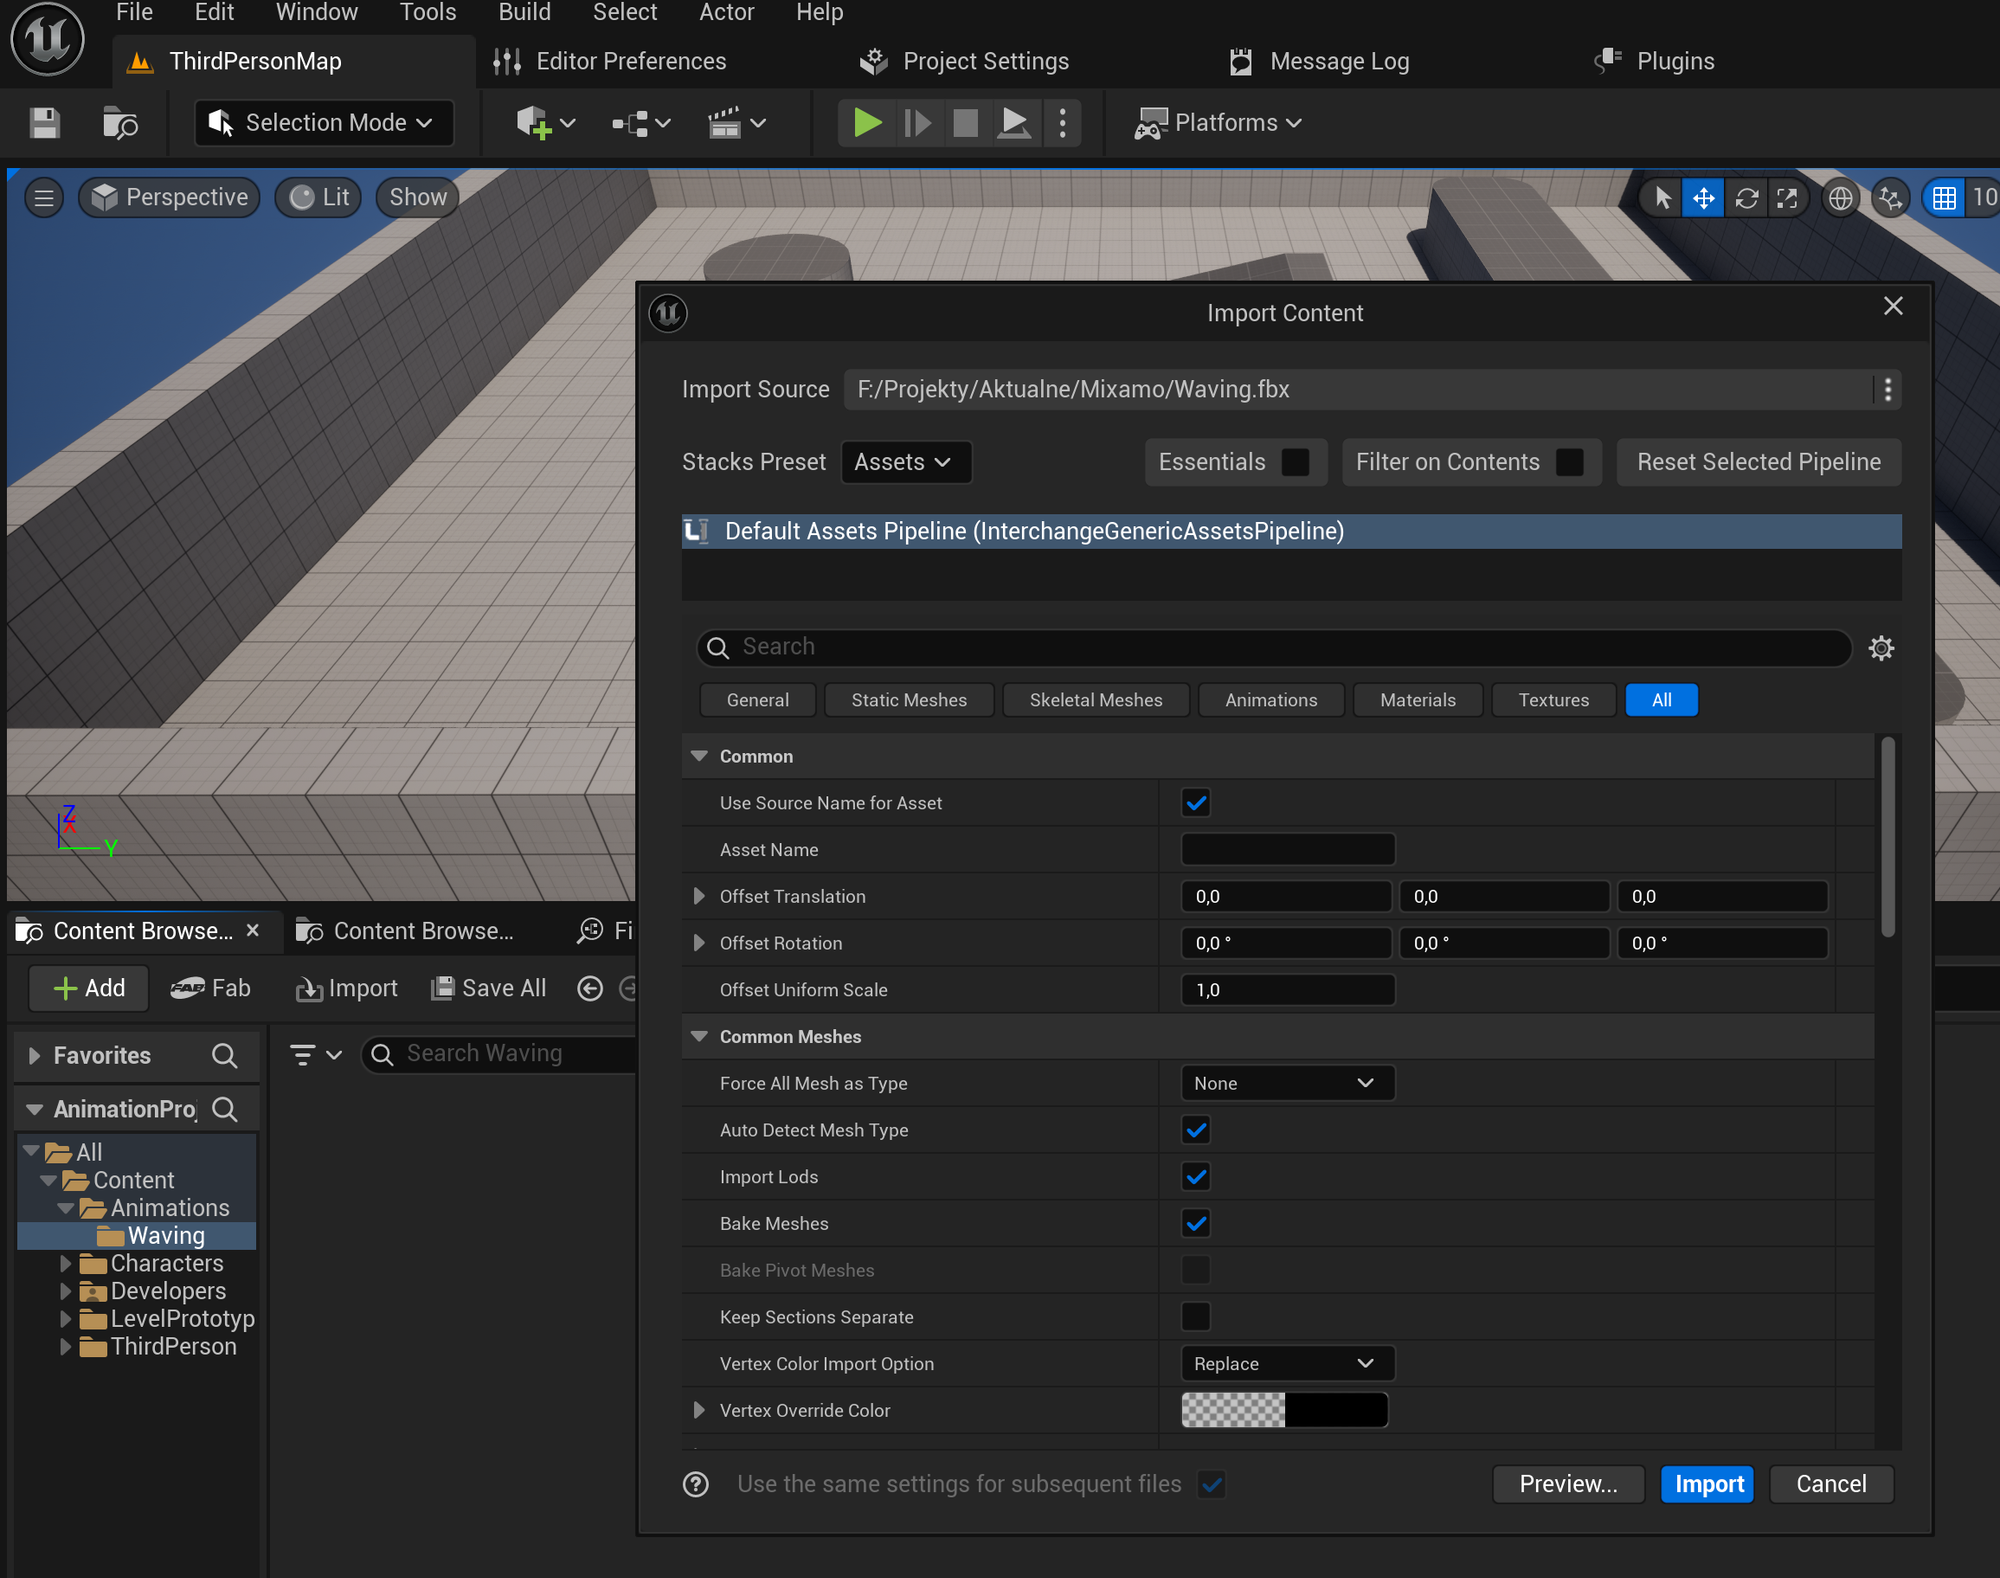
Save all created assets.
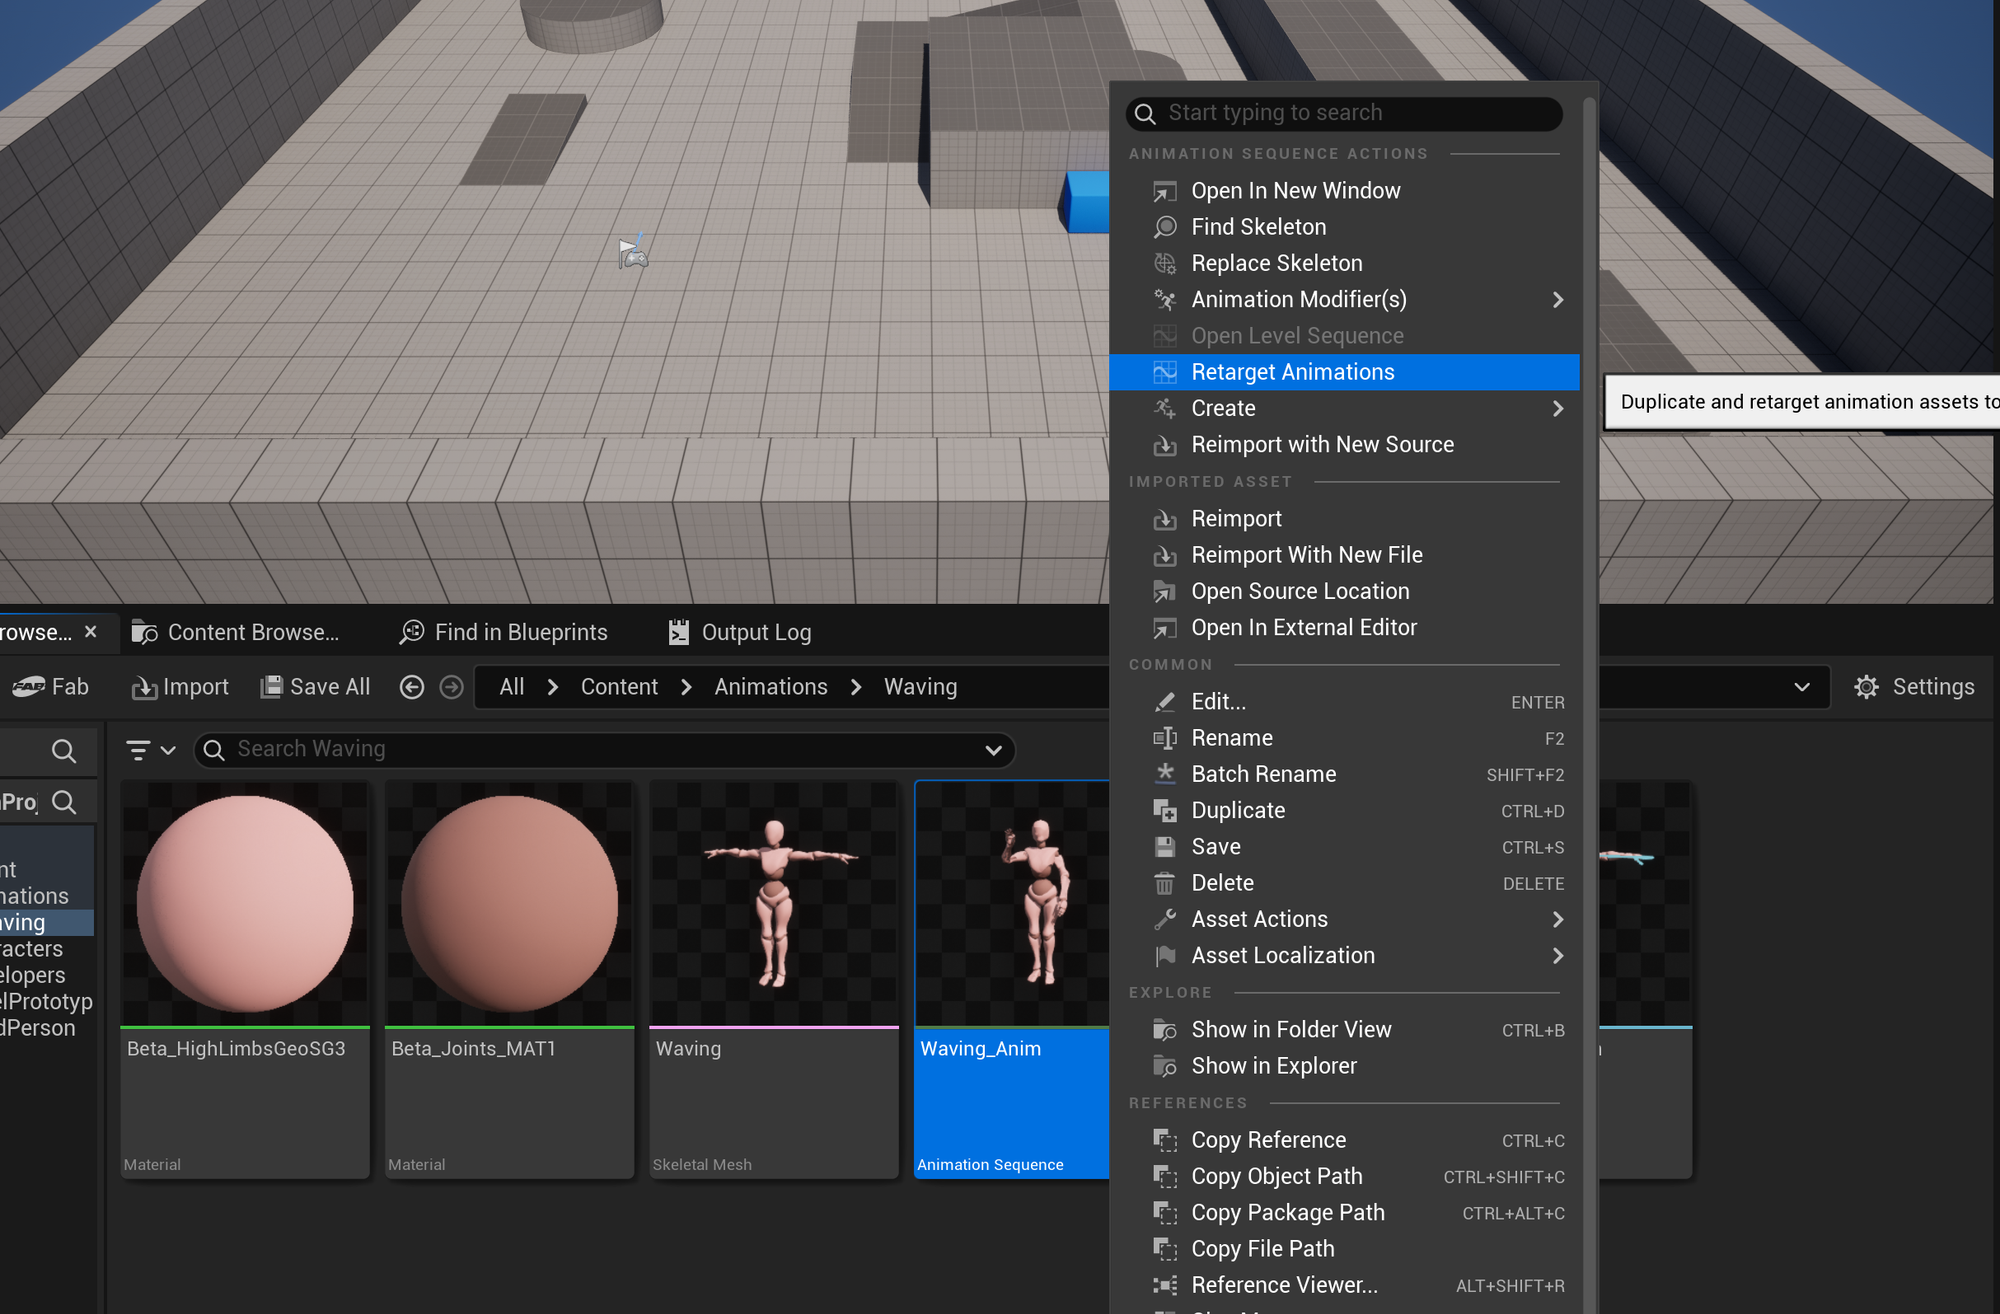
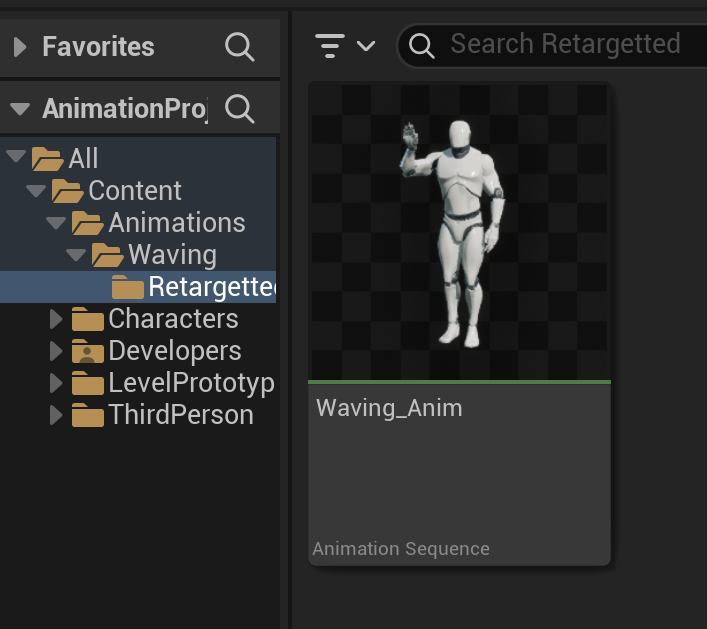
Retarget animation
We need to make the animation to work with our SK_Mannequin skeleton.
Click RMB on Waving_Anim and click Retarget Animations.
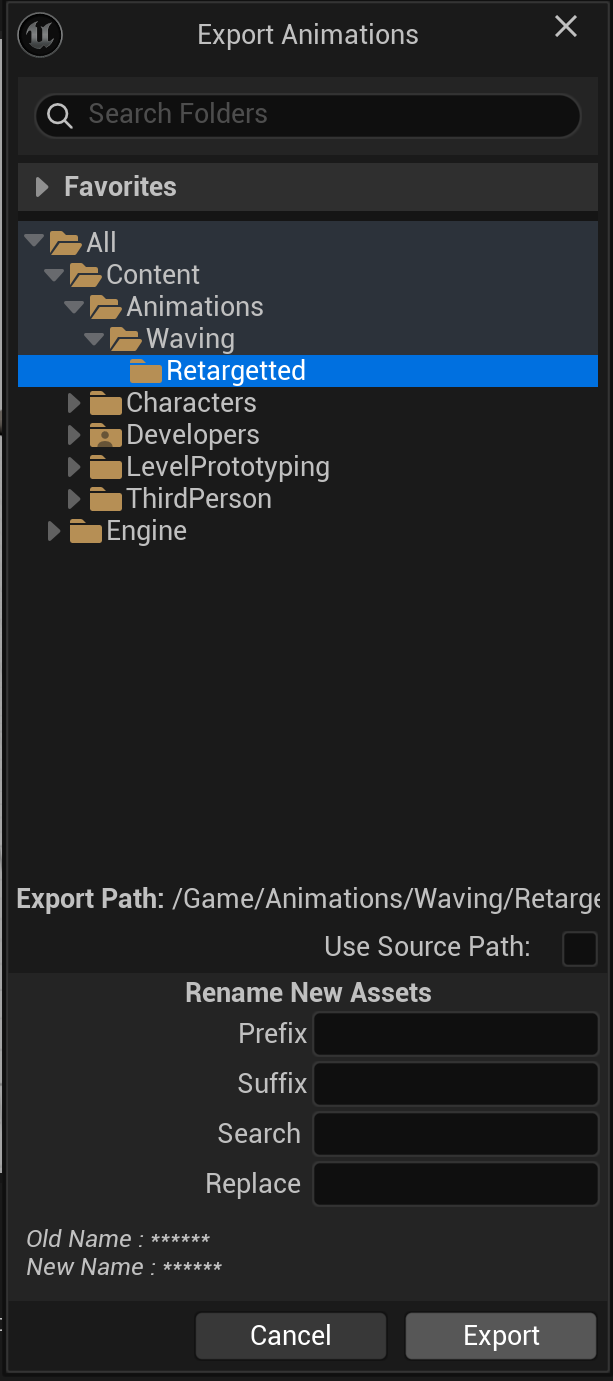
In the Retarget Animations window select Target Skeletal Mesh to SK_Mannequin, select Waving_Anim and click Export Animations.
In the following Export Animations window create Retargetted folder inside former Waving folder and click Export.
Leave defaults in the following Batch Export Options and click Export.
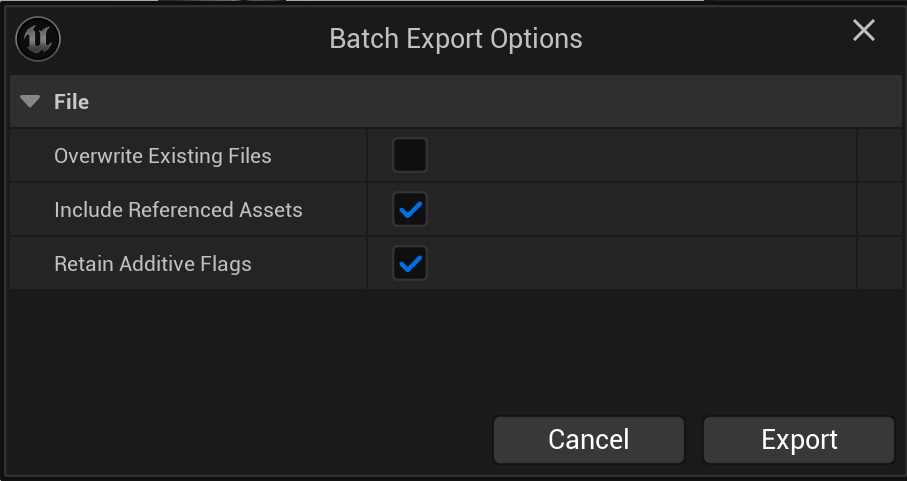
Retargetted Waving_Anim should show up in provided folder.
Place Waving Actor into the Level
Drag the Waving_Anim into the Level. A SkeletalMeshActor Instance will be created.
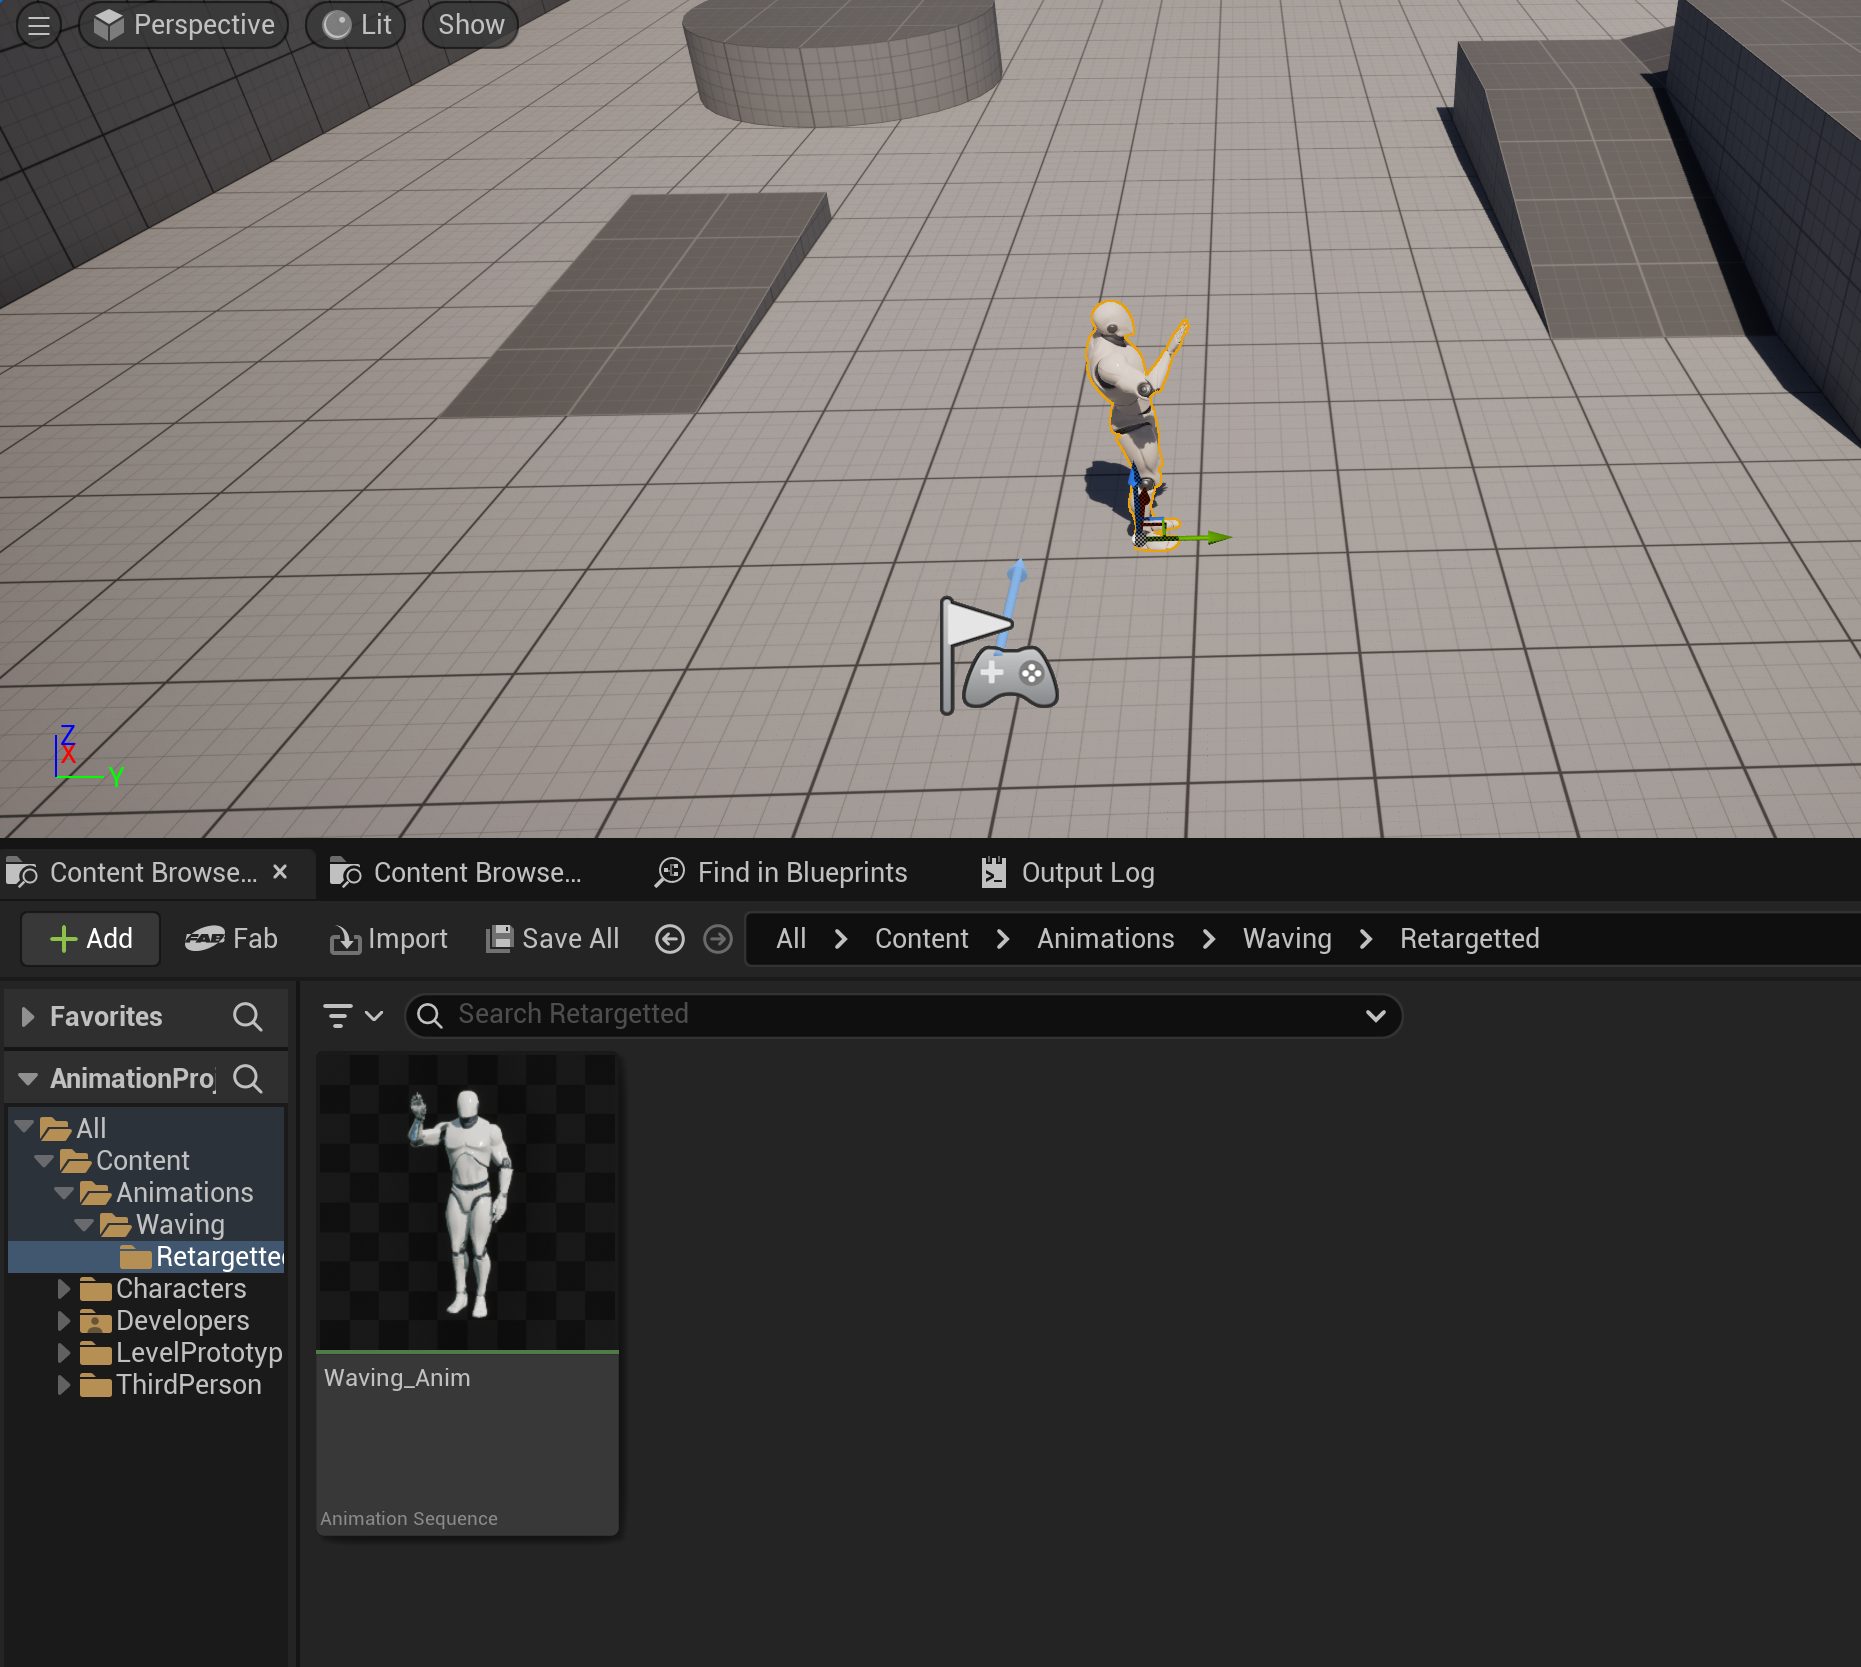
Now modify Location and Rotation of the Actor to the following:
Location: (X=1060.000000,Y=1050.000000,Z=0.000000)
Rotation: (Pitch=0.000000,Yaw=100.000000,Roll=0.000000)
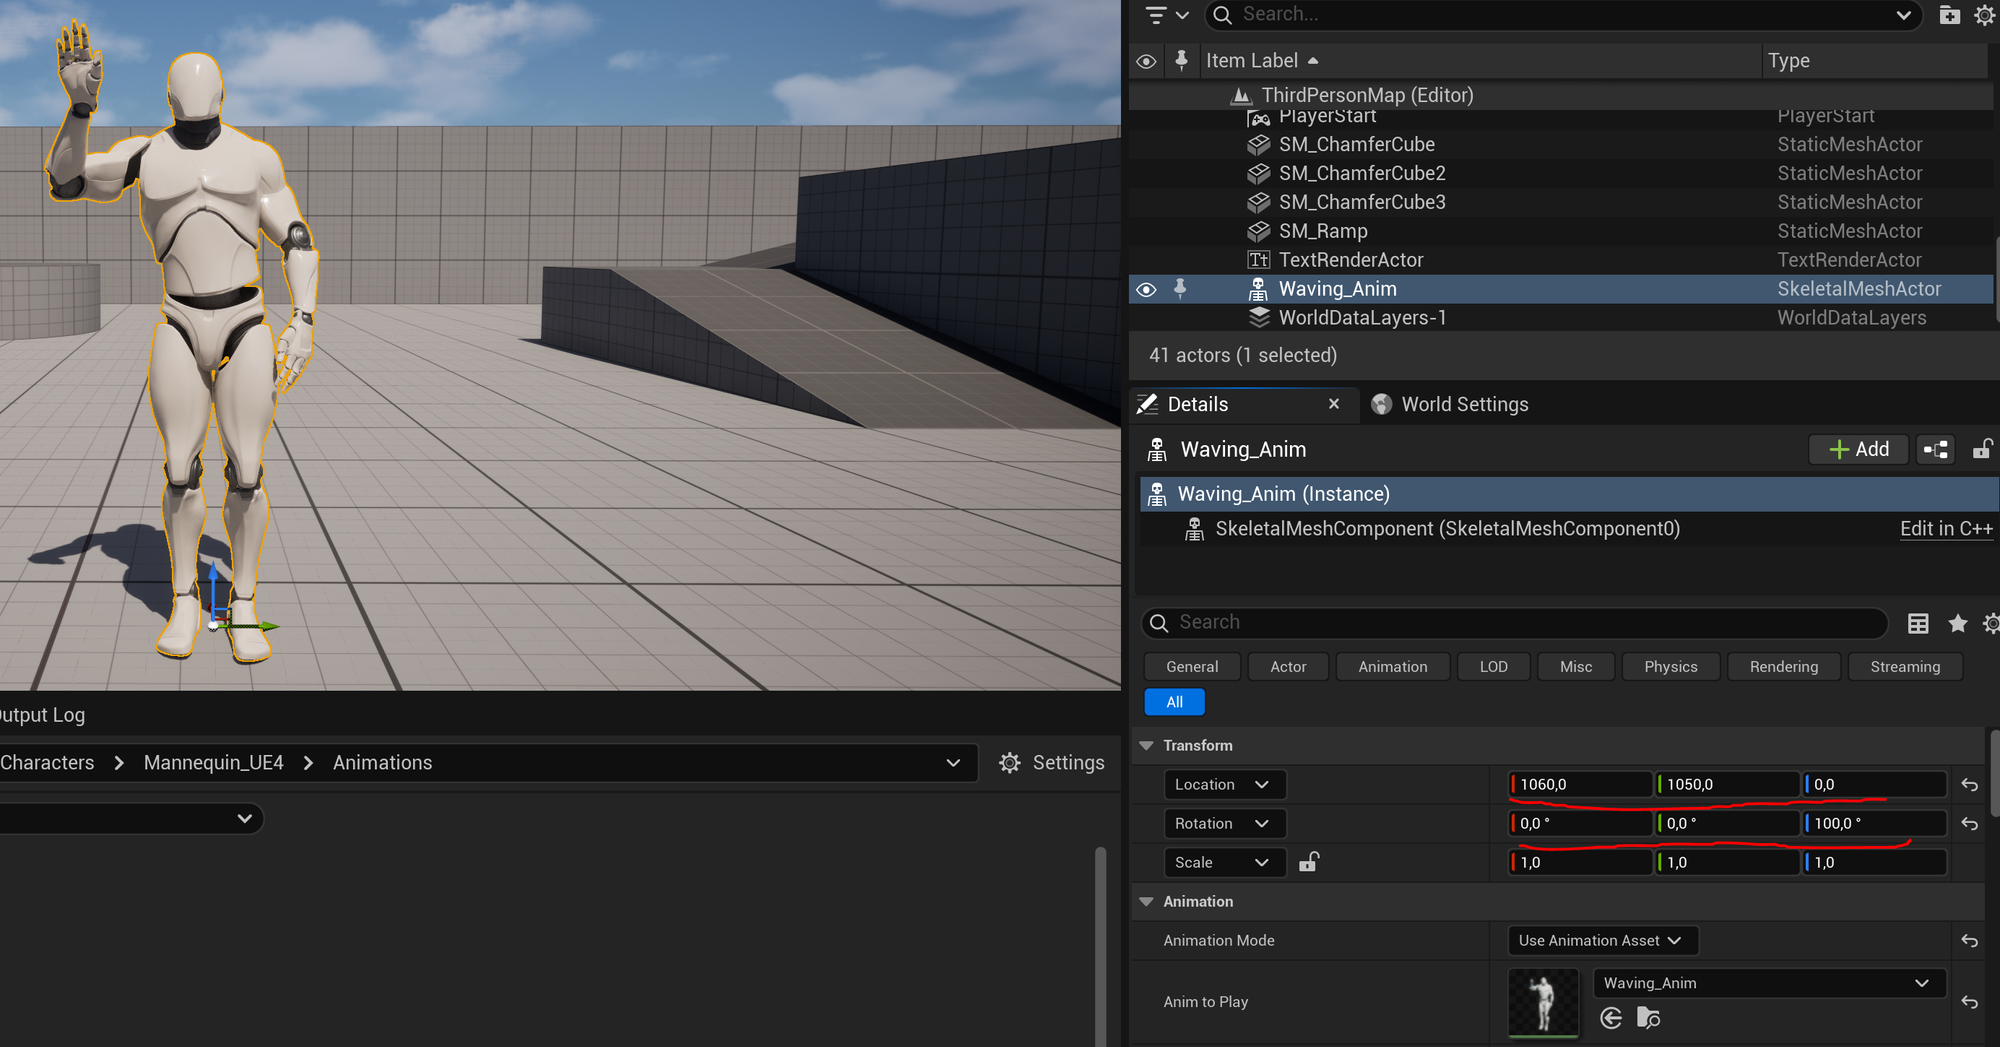
Now when you Play In Editor (Alt + P) you will see the waving actor animating.
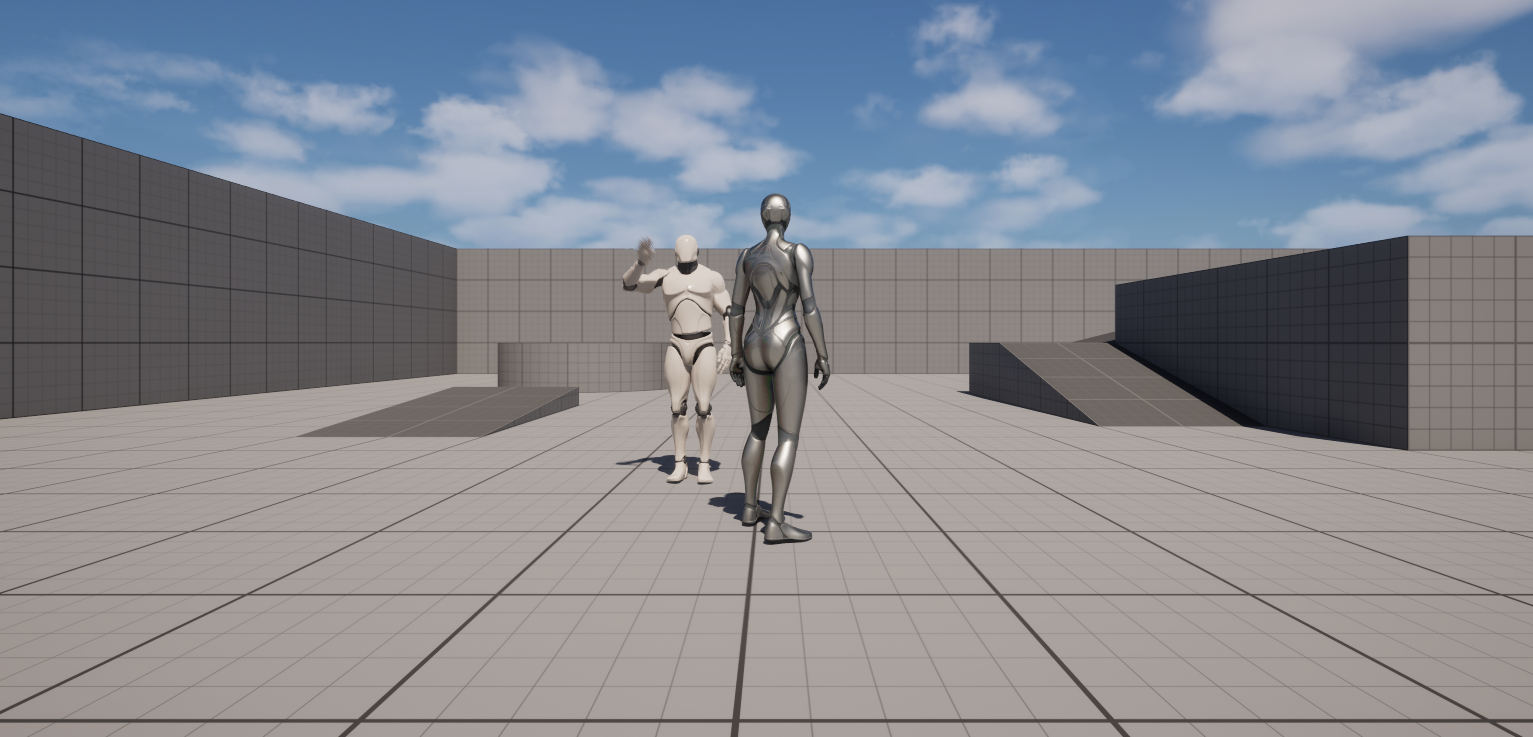
Remove obstacles for camera positioning
Because we used Third Person template we have Character blocking our view. Let's hide it.
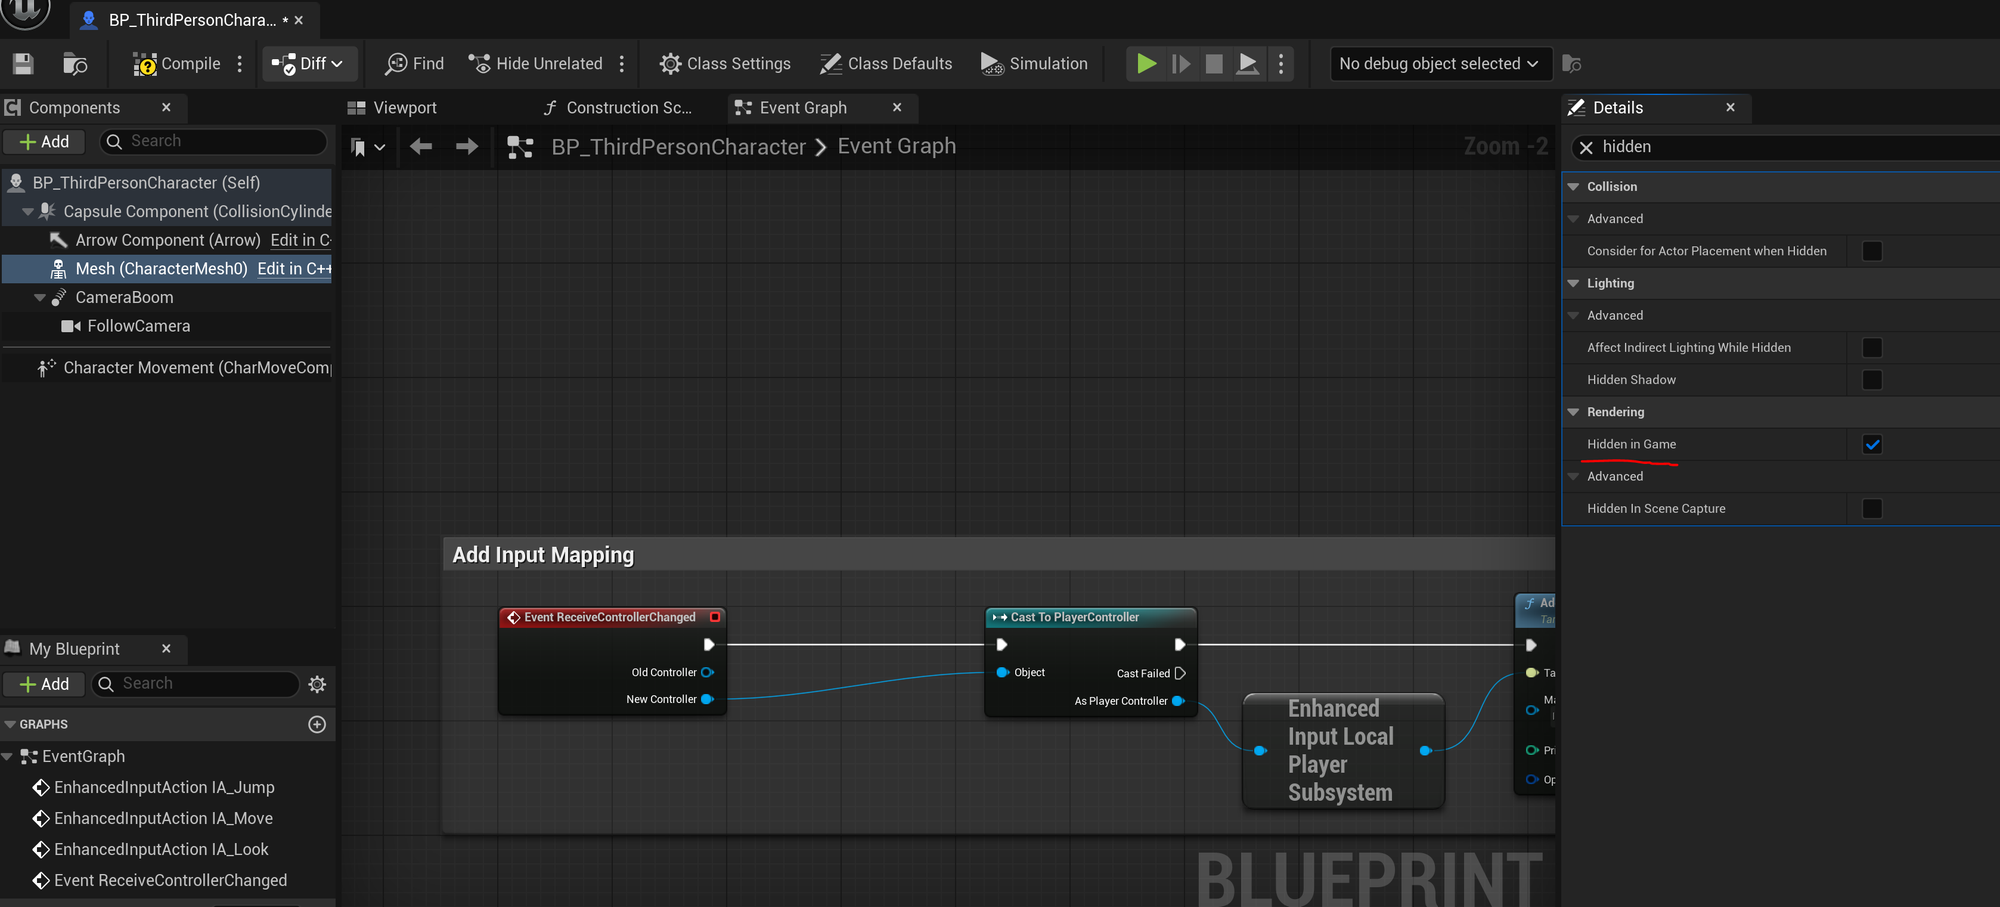
Open BP_ThirdPersonCharacter, select Mesh Component and set Hidden in Game to True.
We are still going to collide with the Waving SkeletalMeshActor. Disabling collisions on the Character will cause it to drop through the floor so we need to disable them on the Waver.
Select out Waver on the Level, go to Details and set Collision Presets to NoCollision.

Disable CPU optimization
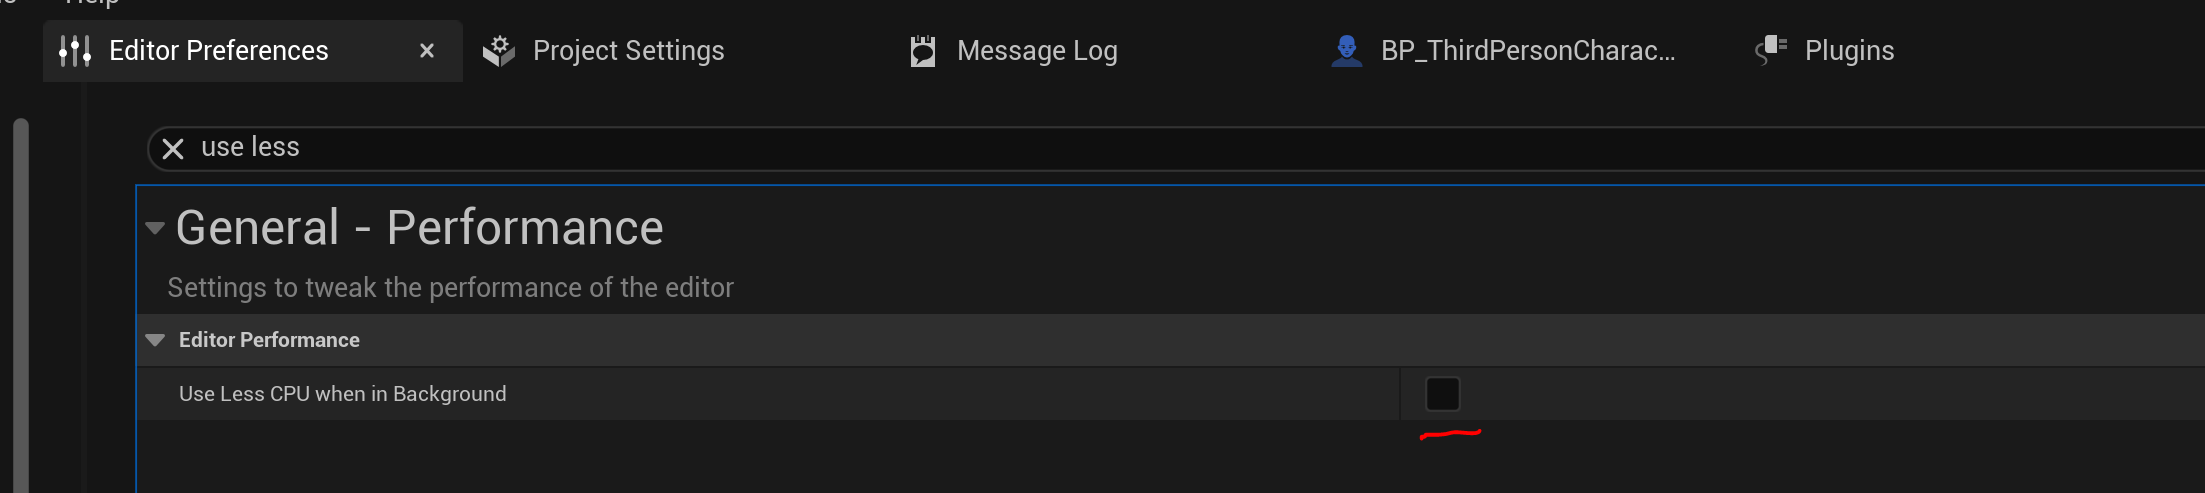
UE5 has special feature to not consume so many resources when not in focus. This inflicts frame skipping and will disturb our recording process so we should disable it.
Open Editor Preferences and disable UseLess CPU when in Background.
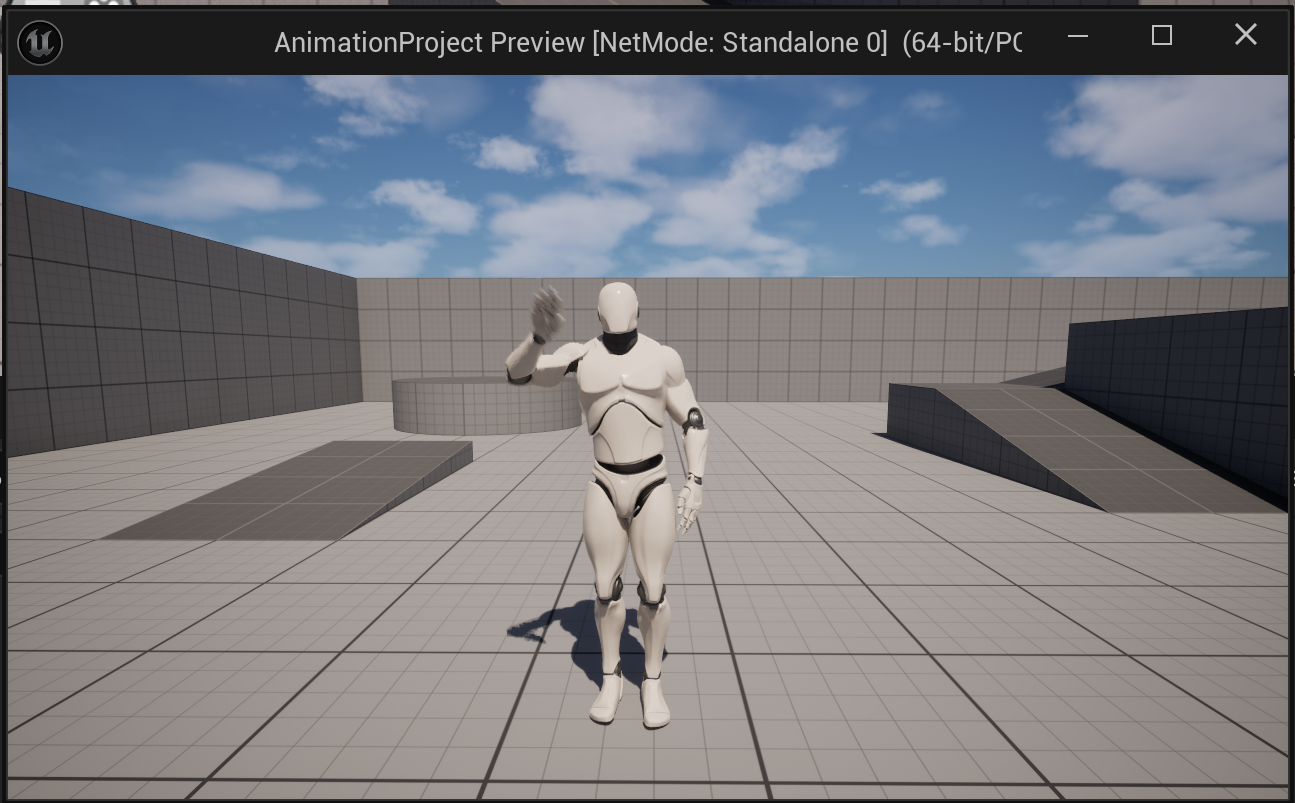
Prepare New Editor Window for screen capture
GIF's size depend heavily on the number of pixels you capture. The smaller the image the better. Because of that it would be easier to use New Editor Window.
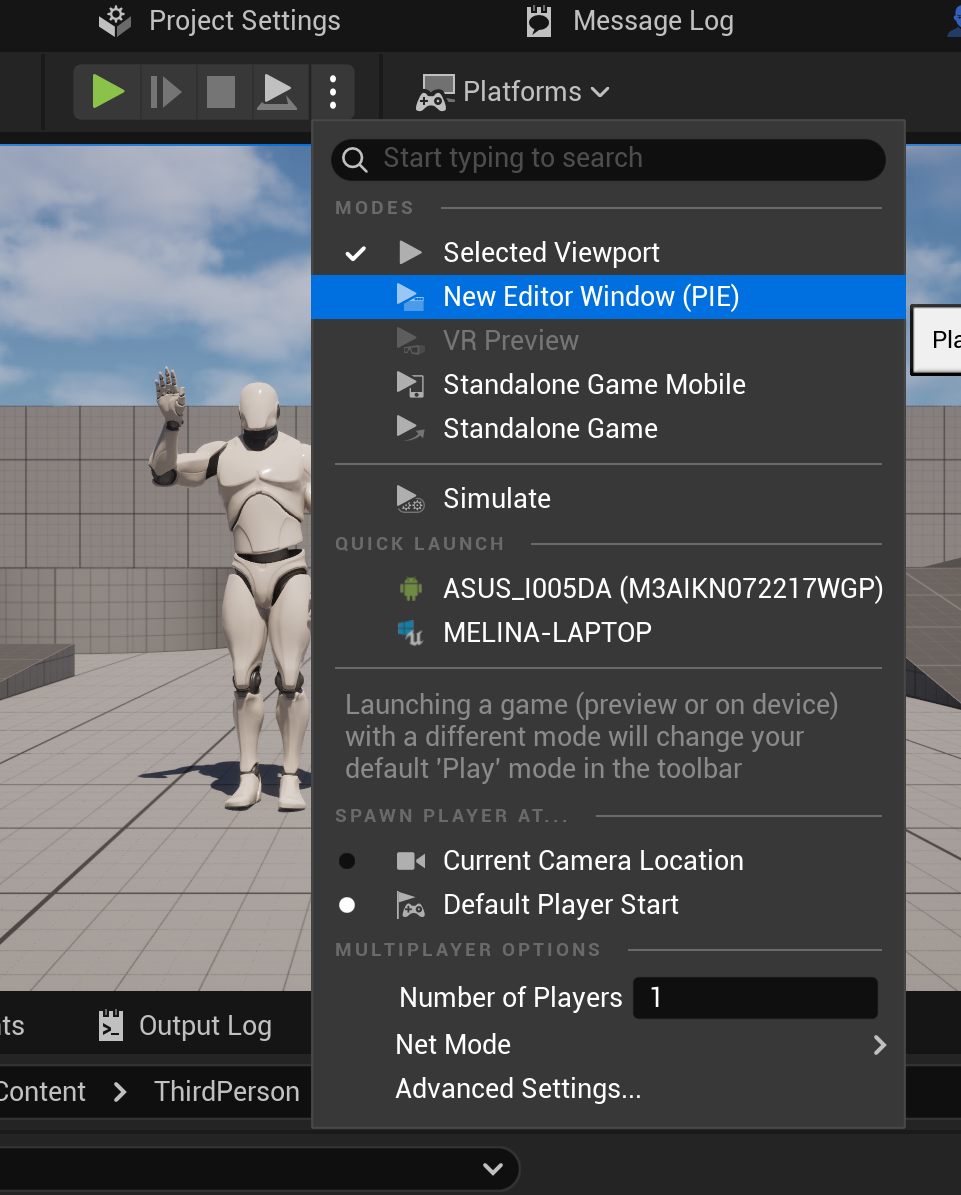
Open Advanced Settings using hamburger menu.
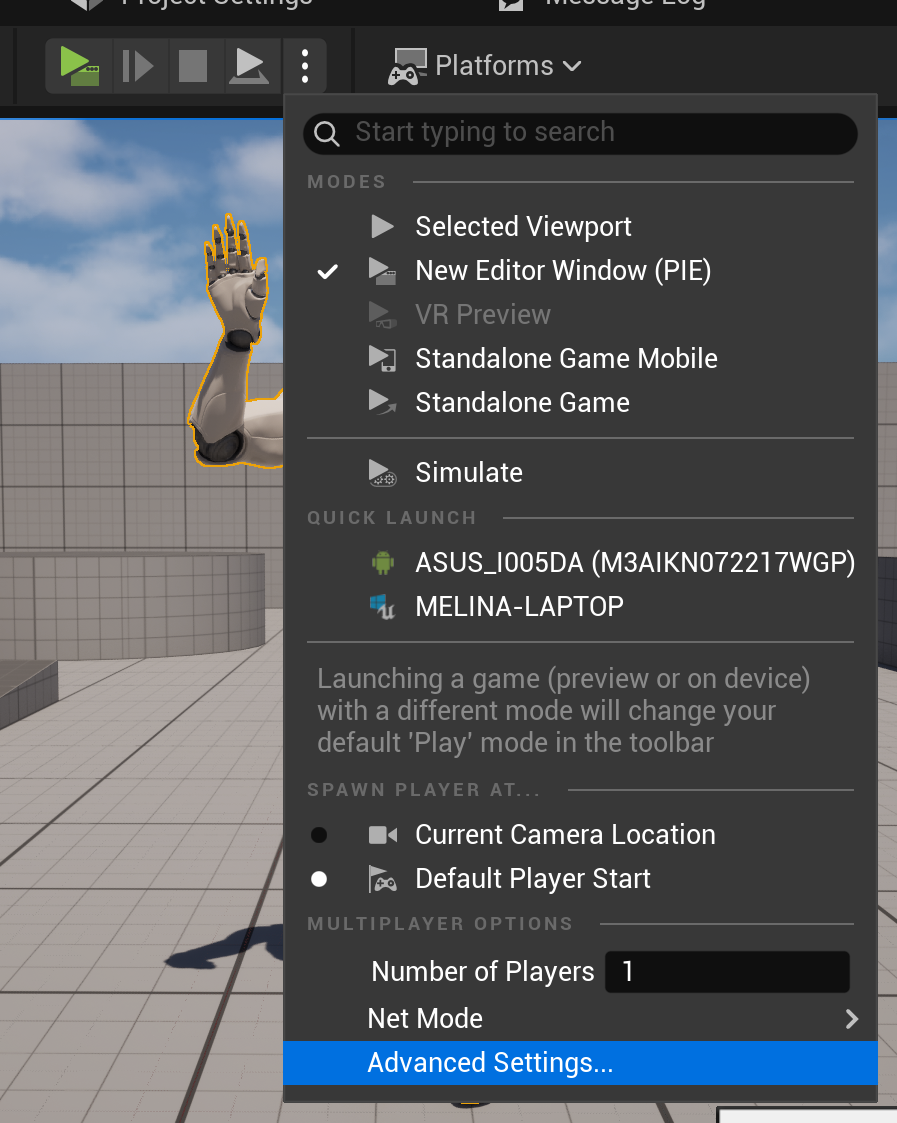
Pick smallest resolution you feel is going to still look good when stretched in web containers. My monitor is 4k which results in smaller window than on 1080p but maintains the same heavy pixel information. That's why I'm going to use 1280x720 but you should experiment yourself having GIF outcome size.

Run the game in New Editor Window.
Position camera for recording
Using controls in game move around to capture the perfect spot like this:
Capture screen with ScreenToGif
Open ScreenToGif and pick Recorder.
Resize the window so the viewport is inside the frame.
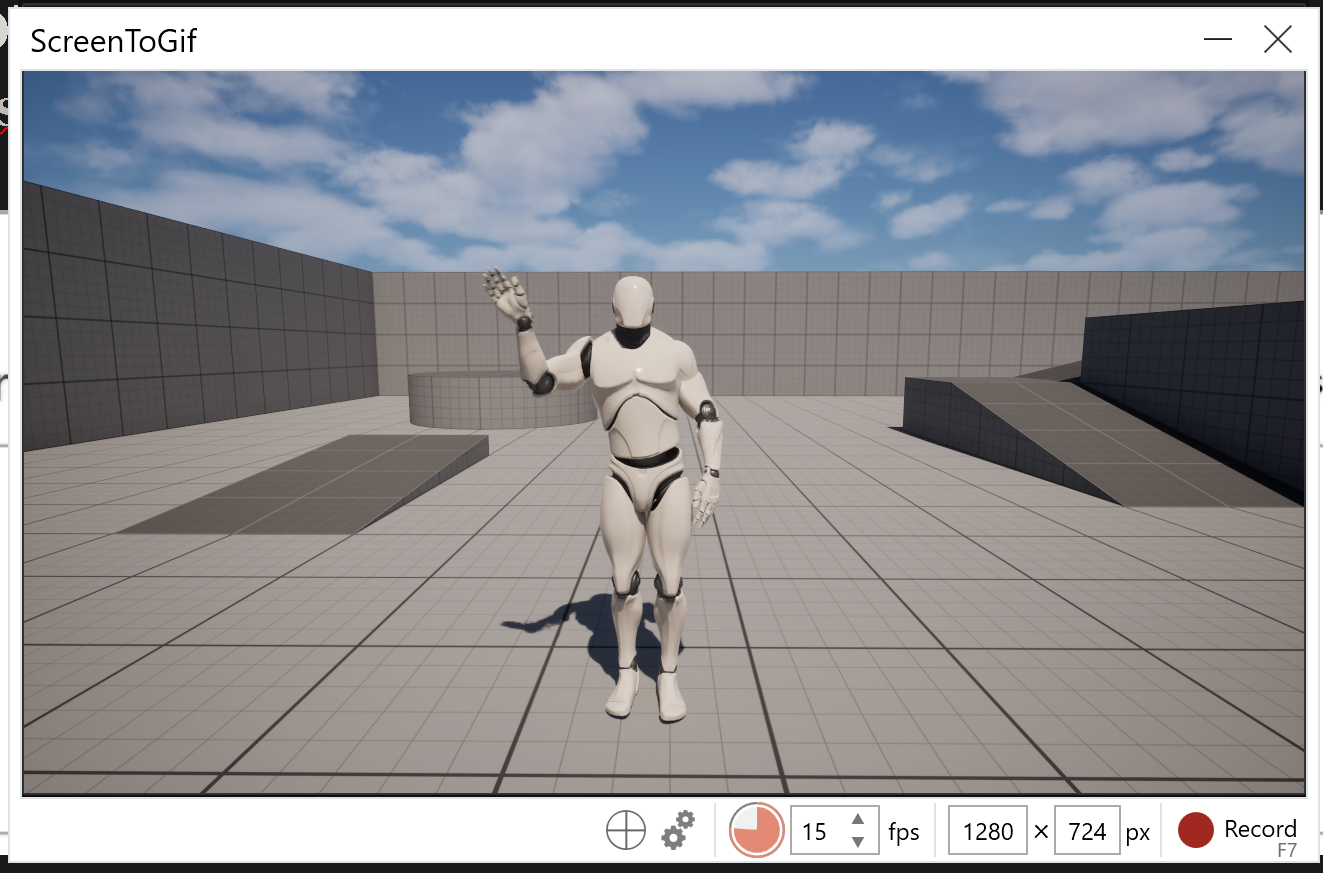
Press F7 to start. Remember that mouse pointer is captured as well!
When content for GIF is recorder press F8 to stop.
Edit captured frames
A frame editor will show up:
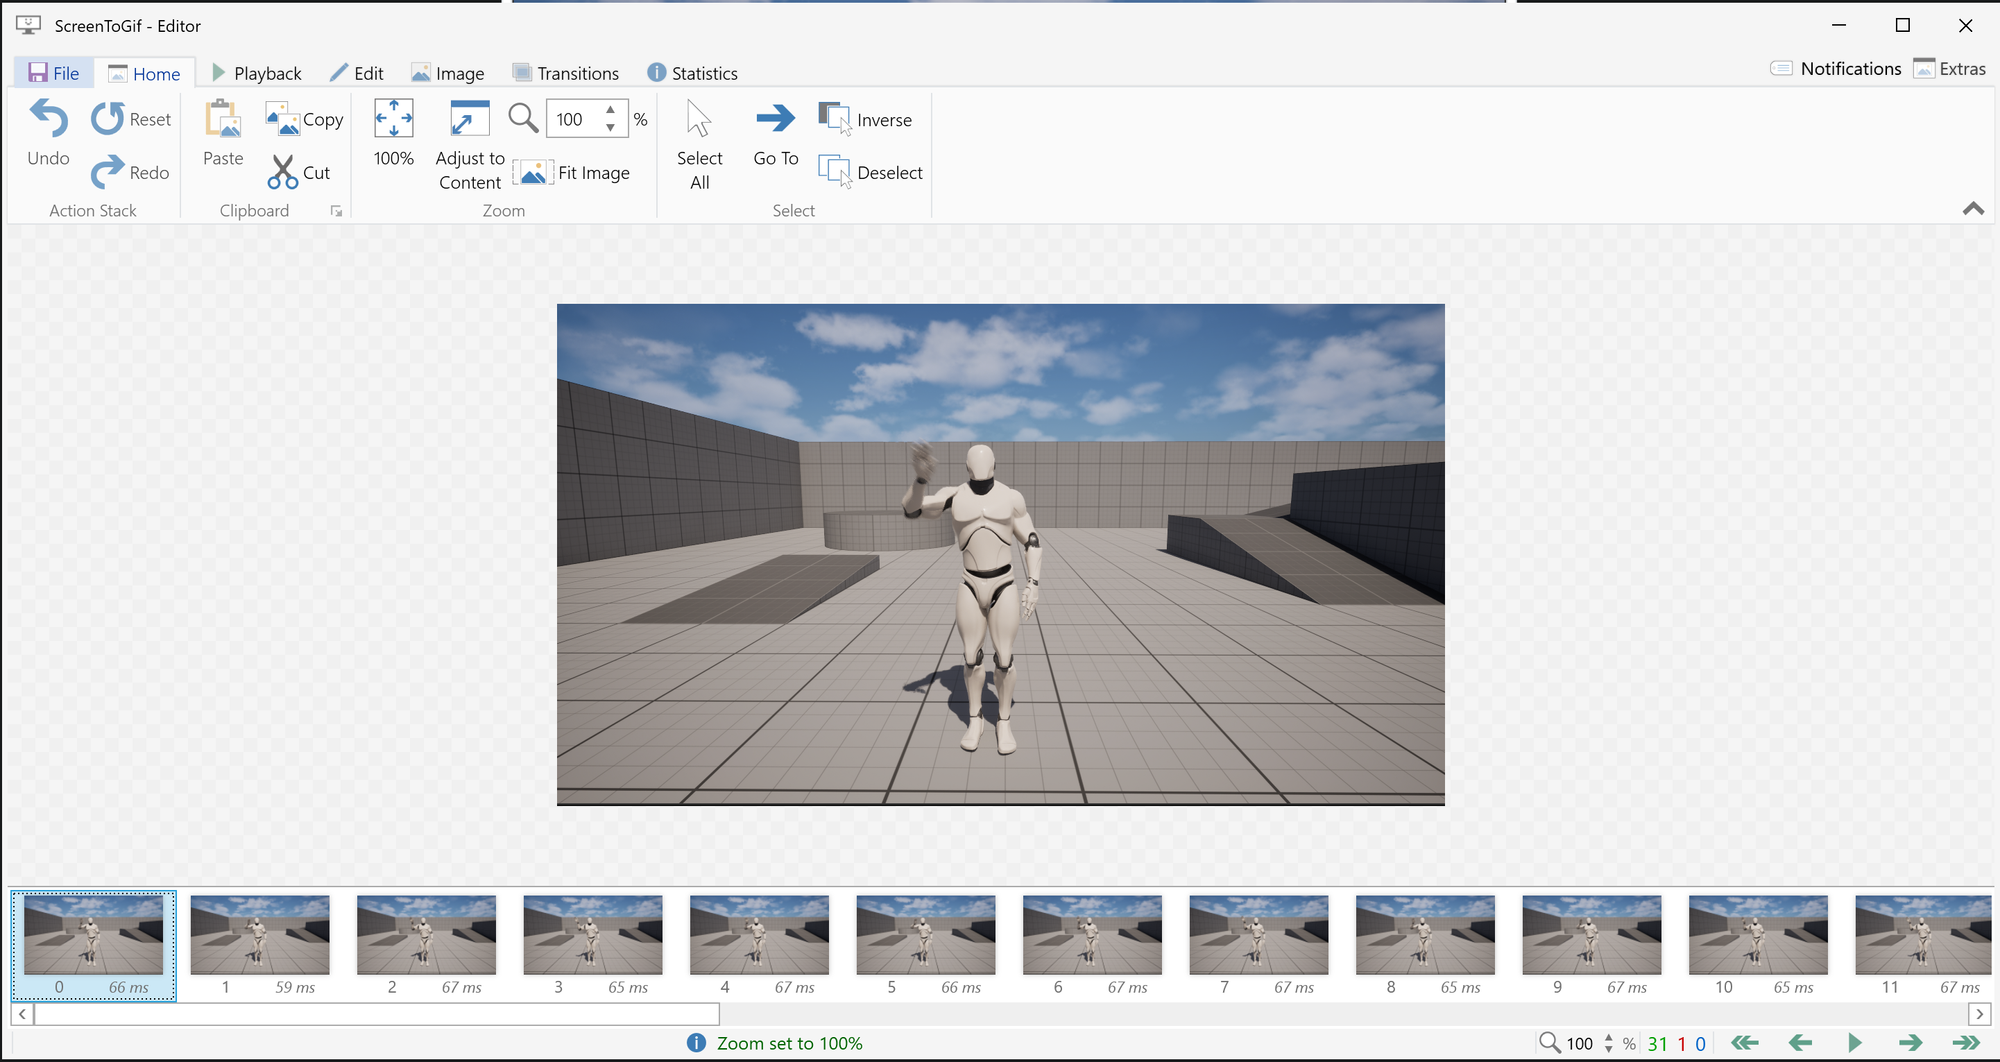
Now it's up to you to pick frames that would make a full loop. Considering our animation length you only need 7 frames. You can test loop using Playback tab.
The frames that are unnecessary can be deleted using Delete key.
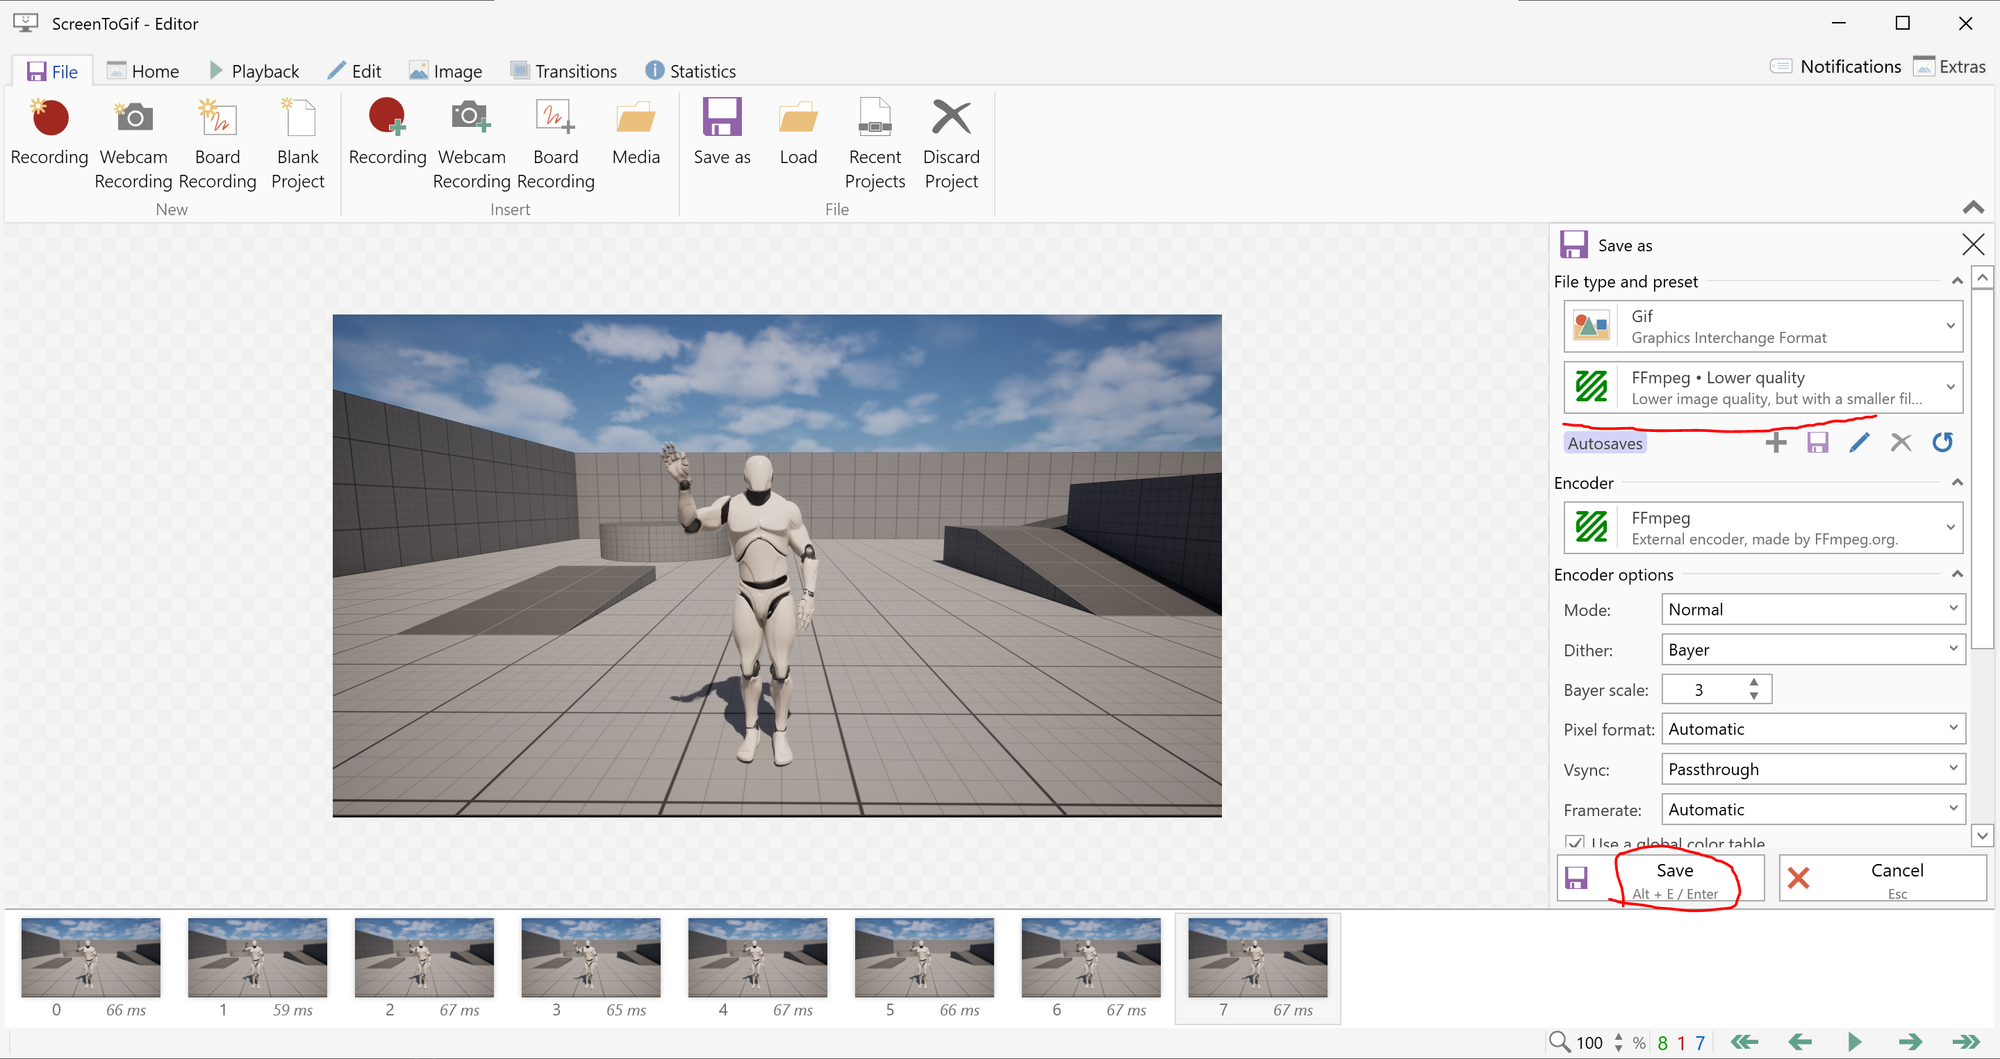
Export GIF
Finally go to File tab and click Save as. I was most satisfied with FFMpeg - Lower quality preset which made GIF both small and good quality.
After configuring click Save.
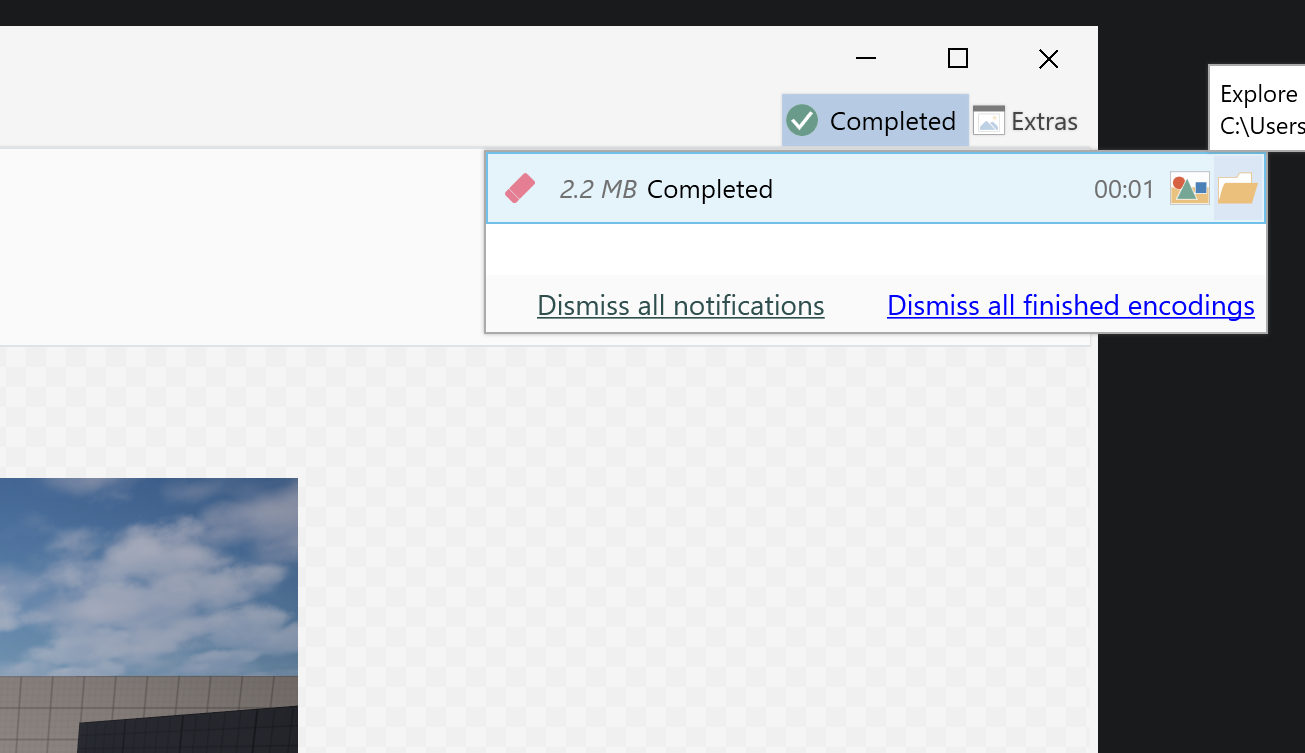
Review produced GIF
When conversion finishes a small window shows up with resulting size and link to folder where the GIF was saved.
Conclusions
ScreenToGif ended up being fairly easy to use software and solved my problem. My GIF animation resulted in 2.2 MB size which I would consider a very good result. I hope it will help you as well.
Possible improvements
- Using Third Person template was simple for educational purposes but can not serve as a recording project in a long run. We should remove the Character completely, setup a Camera, lighting, models and all other stuff required to make it look neat.
- There are other ways to further optimize the GIF size and look. Some of those decrease the GIF size after recording so it would be much more versatile.